The way the scripting tools work in Task Builder 2 and Game Builder is different from how scripting worked in our legacy tools. In Task Builder 2 and Game Builder, you use the Scripting tab to create your own custom components. Once you have created a component in the Scripting tab, it will show up in the Add Component window when you go to add components to your task:
It's not possible to manipulate or change existing Gorilla components through scripting. However, it is possible to "extend" from an existing class to make your own new component that has similar functionality to an existing component. For example, you could create your own Border - Hover component based on the built-in Border - Hover component by extending the existing class:
Your new component would then have all of the existing component's functionality, but you can augment or replace functions to create your own custom behaviour.
To take a look at existing components and see how they are built, you can use the Developer Tools in the browser. Add the component whose code you want to inspect to a task. Then preview the task and open the browser's Developer Tools. Go to Sources > client > participant > complied > task-builder.js. You can then search for the name of the component you're interested in and view how it looks in the code.
The Gorilla scripting tools use TypeScript, a programming language based on JavaScript. Previous exposure to writing code is recommended to navigate around the tools. However, if you have never scripted before, you can watch our Intro to JavaScript video below as a first step:
Check out the list of topics in the menu to learn more about the tools!
Gorilla Tooling operates based on the Object-Component system. The basic idea is that each element on the screen is an object made up of several components, each of which do different things.
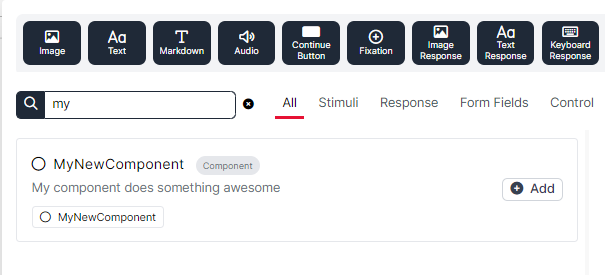
The new scripting tools allow users to create their own components which can provide new, unique functionalities in the tasks. The key point is that every new script created in the Script tab becomes a new component that will show up in the list of components in the Add Object/Add Component menu. For your scripted component to take effect, you will need to add it to your task like any built-in component.
For example, if you create a Task Component called ‘MyNewComponent’ and then go to Displays tab > Object > Add component, you will find ‘MyNewComponent’ appearing on the list of components available to be added to an object. You can combine this component with other components, creating unique objects that meet your specific research needs.
Depending on the functionality you're trying to implement, you will either create a component that is used on the Screen tab (to control things like scoring, saving data or branching), or a component that you add to the Objects tab on the screen itself (to control the appearance or behaviour of individual objects).
Have you scripted in Gorilla legacy tools before? Scripting in the legacy tools allowed to add functionalities to pre-existing zones, spreadsheet content etc. while in the new tools, users can create entire components with novel functionalities, making the new scripting tools the most powerful yet. Since the two generations of tooling differ significantly in their architecture, scripts from the legacy tools are not transferable into the new scripting tools. Familiarity with JavaScript programming from Task Builder 1 scripting, however, is helpful for coding in Task Builder 2.
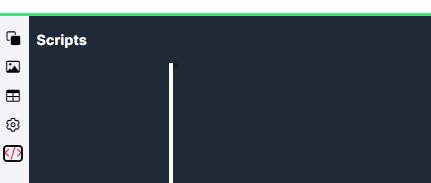
The scripting tools are accessible from the Scripting tab, located in the Task Builder menu, on the left-hand side:
Note: Error messages displaying in the error console will show errors from all the scripts in the task. It is important that all the errors are corrected before you try the functionality of your newly scripted components because errors in one script can impact the functionality of another script, preventing the components from working properly.
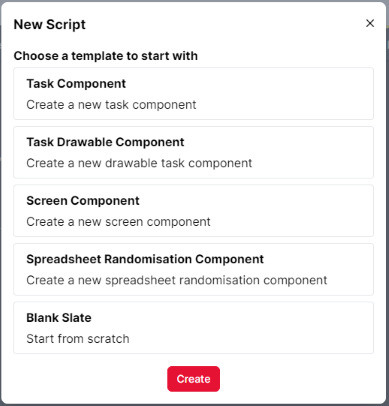
When you go to the Scripting tab for the first time, the script editor is blank. You will see a +New Script button in the top right corner. Clicking on the button brings up a menu of script templates for the most common use cases. For information on templates, head to the Examples section of this guide.
Gorilla Scripting tools allow you to control almost anything you want within your task, but there are some most commonly used cases for creating custom components in Gorilla. These include creating new screen components, setting up custom spreadsheet randomisation, etc.
Templates for the most common scripting cases are available in the Template Menu when creating a new script - these will give you a pre-populated script that you can simply edit and fill in. We recommend that you use one of these as a starting point and adapt it to add the functionality you want. You can also choose a completely blank slate and then use one of the other templates from the examples linked in the menu of this guide (or, for tech-savvy programmers, implement your own code).
To see the scripting tools in action, let's create a simple 'Hello World' component. It will allow you to add it to an object on your screen, and contain a single configurable field where you can enter some text. When you preview your task, it will display the text you entered in an alert box.
Firstly, create a new task, open the Scripting tab, and click New Script. You should see the New Script menu:
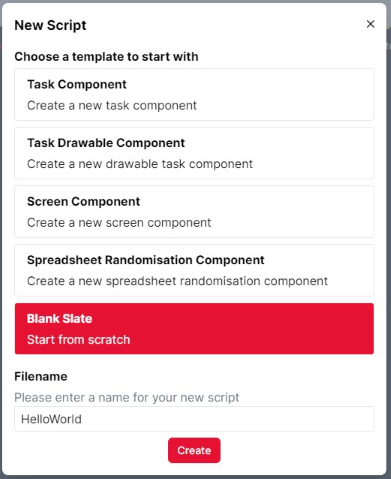
Choose a Blank Slate for now (we'll talk about the templates later), and name your script HelloWorld.
Next, paste the following code into the editor:
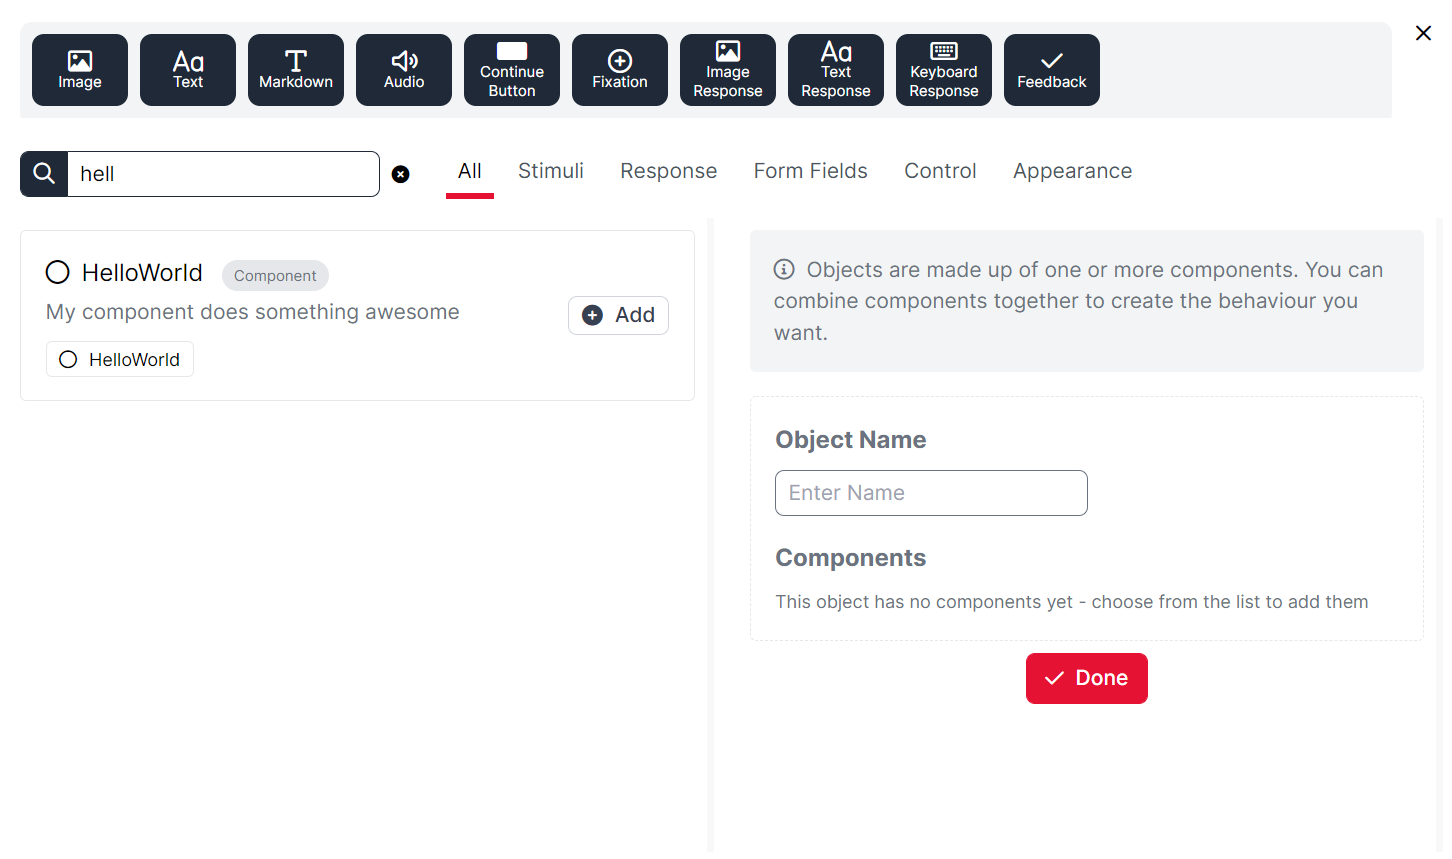
In your task, create a new display and screen (consider using the Instructions Screen template so you've got a working screen), and then click Add Object. Search for HelloWorld, and you should see your new component appear in the list:
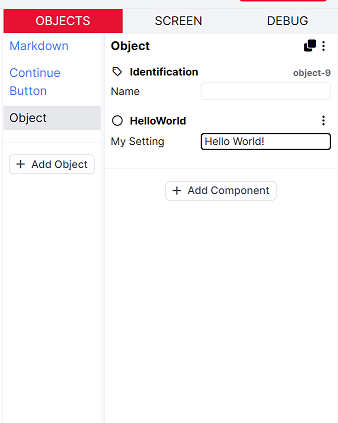
Select the object, then click on it on the list of Objects. Add some text into the 'My Setting' box (e.g. put the text "Hello World!"):
Finally, let's preview the functionality of your new component. Click the Play button at the top of the screen, and you should see the text you entered appear in an alert box:

Congratulations, you have added a new scripting component to your task! Now, continue to the Anatomy of a Script section to learn more about what needs to go into each script to make it work.
In this section, we go through elements of a script step by step to help you understand how it's built and how to edit it.
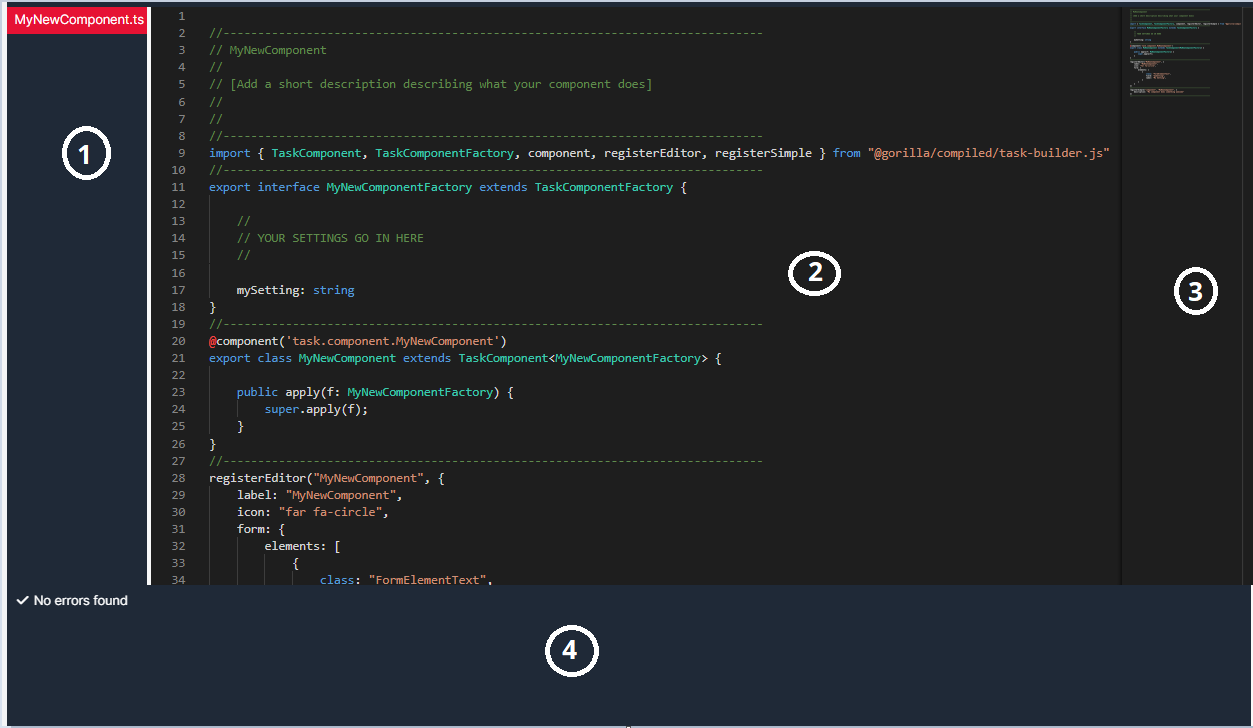
All components in Gorilla follow the same basic structure - whatever kind of component you're making, it will always contain the following parts:
Read about each part below:
This section is optional, but we think it's good practice to have a standard comment block at the top of the script that details what the component does.
You can import any of the Gorilla types from @gorilla/compiled/task-builder.js. This is the compiled bundle that exports all the types and classes that Gorilla uses. Note that the @gorilla part is a placeholder - this gets expanded to the correct path when your script is compiled.
If you have multiple scripts of your own, you can import between them using simple relative paths. For example, if you have two scripts called scriptA.js and scriptB.js, and you want to use a class or function from scriptA.js in scriptB.js, you can simply do:
Each component has some settings that you can configure, and we call the structure that contains those settings the component's factory. A factory is simply where you define what the settings are that your component exposes. In your script, you can access those settings via this.factory. This allows you to build your component's core functionality without worrying about the specific content that it's going to use - you can think in terms of 'some text' or 'an image', and allow the specific text or image to be specified later (or, indeed, to be different on different screens).
This is the code for the actual component itself. There are a few key parts to this:
@component() directive at the top - this is a special piece of code called a decorator that tells the Gorilla system that your component exists.ScreenComponent rather than TaskComponent.... extends TaskComponent<HelloWorldFactory>) to the baseclass - this makes sure that when you access your factory using this.factory you see all of your custom fields.Note that, most of the time, this will all be done for you when you use a script template - you pick the baseclass you want to start from, and all of these settings will already be configured.
The actual body of the component is where you put your own custom code - you can implement the functionality that you need by implementing one or more core functions. In this HelloWorld example, you can see that we use the screenStart() function to run some logic when the screen starts. There are several other functions which you can override which get called at key points in the task logic. We call these lifecycle functions (as they are called at specific points in the component's lifecycle). You can see a full list of them here:
This section allows you to specify how your component appears in the Gorilla editor. You can configure a label and an icon, and most importantly, the form fields that should appear in the configuration panel. Crucially, these form elements should match the fields in your component's Factory - this is how you (and others) will configure those factory settings when using your component.
There are several different classes you can use for the editor fields (e.g. text, dropdown, toggle etc) - you can see the full listing of them here:
This final section registers your component with the system, and allows you to add a description. This description will appear in the Add Object and Add Component menus, and should be a short, single sentence describing what your component does.
You can use the Binding system in your scripts to give you access to dynamic variables from the spreadsheet, Store, and manipulations.
When configuring a setting in your component's factory that you want to be bindable, the factory part doesn't change:
You just need to use one of the bindable form types when registering your component:
This will tell the Gorilla editor that, as well as allowing the actual text, you're also happy to receive a binding string instead. This is a special string that contains information about where to look for a particular value, rather than containing the value itself.
Binding strings have the following format:
${sourceName:settingName}
So, for example, when bound to a spreadsheet column called instruction, it would look like this:
${spreadsheet:instruction}
If bound to a manipulation called 'prompt', it would look like this:
${manipulation:prompt}
The simplest way to use a bound field is to simply call this.injectBindings(). This will invoke the binding system and return the final, resolved value. This is most useful when using a bound value once (e.g. when configuring some text at the start of the screen):
Now, whatever myBindableSetting is bound to (or even if it's not bound at all), the call to injectBindings will resolve the binding chain and return a value that you can use.
This is fine for many use-cases, but has some drawbacks:
myBindableField is bound to changes during the screen, our text will not update, because we only set it once at the start of the screen. To mitigate the two issues above, you can use a 'live' binding. This takes a little more setup:
To use a live binding, we first need to declare a member variable to hold our Binding object, and create it in our construct() function:
This creates our binding object, and also allows us to pass in a callback to call whenever the value of the binding changes. In this callback, value will be the new value of the binding, so we can pass this directly to our setText() function without needing to call this.injectBindings() (as this step has already happened).
We also need to pass our factory setting through to our binding in the apply() function:
Note the call to super.apply(f) - we need to make sure we still call into our baseclass.
Now that we have an actual binding object, there are some extra things we can do:
Access the resolved value at any time
We can use this.myBinding.value to access a resolved value for our binding at any time. If there are other lifecycle functions where you want to access the bound value, you can always do so here.
React whenever the bound value changes
We can use the callback we specified in this.createBinding() to run some logic whenever the bound value changes.
To save to a field in the Store within your component:
Ensure Binding is imported within the import command at the top of the script.
Within the @component block, declare a member variable to hold our Binding object.
field matches the name you gave the setting when you added it to the factory. The label should be the text you want to appear in the user interface next to this setting. For class, enter FormElementBindableField. You must use this class or Gorilla will not be able to write to your bound field.construct() function within the @component block.apply() function within the @component block. Again, the name you use after f. must match the name you gave the setting in the factory.@component block. The following example uses the screenStart lifecycle method, meaning the value will be written to the field when the screen starts. Within the lifecycle function, use .write() to write the value you want to the destination field. The following example writes to the field when the screen starts.This simple example always writes the value of 5 to the destination field. To see a more realistic example of doubling a participant's response and then writing the resulting value to the Store, check out our Custom Data Saving example.
You can access DOM elements of drawable components on your task screens. A drawable component is any component that can be given a position and size and be placed on the screen, for example an Image component.
The way you access DOM elements of drawable components depends on whether your scripted component is itself a drawable or not.
Your scripted component is a drawable if it extends from TaskDrawable (this will be the case if you created it using the Task Drawable Component template).
Within your script, you can access elements of the drawable using this.frame.
this.frame is a jQuery wrapper for the DOM of the current object, so this.frame.find() can be used to access other DOM elements on the same object as well.
If your scripted component is not itself a drawable, it can still access DOM elements of a drawable component that has been added to the same object. To do this:
Within your script, you can then access elements of the drawable using this.drawableFrame. This is a jQuery wrapper, just like this.frame for a drawable component.
Note that this.drawableFrame is only accessible if a component extending TaskDrawable (e.g. Image) is on the same object - otherwise this property is null.
You can find examples of how to access DOM elements of objects on the screen by looking at the code of existing Gorilla components, as explained under the heading 'How can I see how existing Gorilla components are built?' in the Introduction.
The jQuery library is bundled for our tools, which means it can't be imported at the top of a script like other external libraries.
Instead, you can access jQuery functions via the window. To access jQuery within your script, use the syntax window['$'](). For example, to access the jQuery window object and make it scroll to the top, you would use
To import external libraries for use within your Task Builder 2 script, use import:
Depending on the library, you can then use it either via window["packageName"], or declare the library as a variable:
If you are a pro programmer who feels comfortable in scripting environment, you can skip this part. But if you are fairly new to programming, find it challenging or just want to hear some tips that we find helpful, see our top tips below.
This one might seem obvious but do write down your end goal. Make sure it’s specific as this will make writing the script easier.
If you are using scripting tools you probably want to introduce something innovative into your Gorilla task and, like with every big idea, this might initially seem daunting. A helpful strategy is to think of what actions need to happen in your code to achieve your goal and then to break these actions into small steps. Write those steps down - this is a helpful practice to make sure you understand the code and can work through it step by step, in manageable chunks, rather than struggle with a big complicated picture.
Use comments within the script to document every step involved in your code, describe the variables you are using and the purpose and outcome of different functions in your code. This will really help you staying on top of the script, making sure you understand what each part is responsible for. If you have a lot of projects happening simultaneously, or go for a long holiday, these notes will help you stay on track with your work - you will thank yourself later! This practice is also excellent for collaborations and sharing your work with others in the spirit of Open Science 🙂
Once you have your steps written down and therefore are clear on what you need to do in order to write your component, start filling in the steps with code. The Gorilla tools use TypeScript, a programming language based on JavaScript.
Before previewing your newly scripted component, fix any errors that might be showing in the error console in your Scripting tab. The error messages displaying in this panel will show errors from all the scripts you have created for this task. It is important that all the errors are corrected because the errors in one script can impact the functionality of another script and therefore your components might not work as intended.
At Gorilla, we are dedicated to providing powerful tools that allow researchers to collaborate and share their work within their team, as well as with broader science community. You can share your work with others on Gorilla Open Materials page. There, you can also see other’s work and use it for your studies - it’s a win-win!
In Gorilla, the order in which displays in the tasks and scenes in the games are shown is specified in the spreadsheet, where each row represents a time step in the task/game.
Spreadsheet Randomisation is used when you want to randomise the order in which participants see the parts of your tasks/games.
There are many built-in randomisation options which allow you to dynamically change the order of the trials - you can review them in our Spreadsheet Randomisation Guide. However, you might wish to create a new randomisation method for your tasks/games and you can do so by creating your own spreadsheet randomisation component.
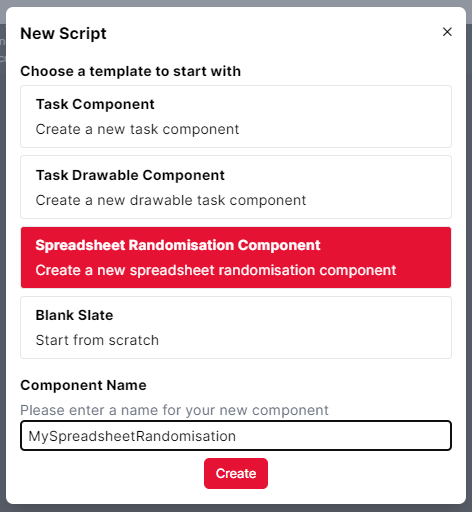
Start by creating a new component with the Spreadsheet Randomisation Component template:
You can now implement your logic in the randomiseSpreadsheet() lifecycle method:
For a worked example of a new spreadsheet randomisation component see our Custom Spreadsheet Randomisation Example.
Scoring in Task Builder 2 and Game Builder allows you to control whether a response should be considered correct or incorrect. The built-in scoring components Scorer and Scorer Multi work on the basis of simply matching the given response with a particular string (or one of a list of strings).
But what if you wanted to write your own scoring logic? Perhaps you're collecting numeric responses, and want to mark something as correct if it's above or below a certain value, or within a certain range. Or maybe you want to tie the correct answer to the time of day - some responses are correct in the morning but incorrect in the afternoon. For any of these types of scenarios, you can create your own scorer.
Start by creating a new component with the Screen Component template:
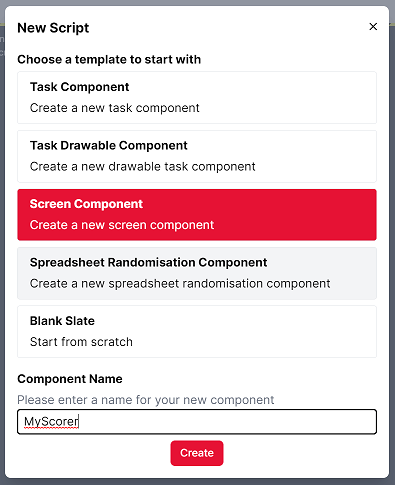
You can now implement your logic in the scoreResponse() lifecycle method:
The response object that is passed in contains lots of information about the response that is being processed. You can find a full reference of all the properties here:
For a worked example of a new scoring component see our Custom Scoring Example.
In Gorilla, you can save participants' data, such as their responses or accuracy scores, in the Store. Each piece of data that you save in the Store will be saved in a named field, so that you can retrieve it and use it later in the task, game, or experiment.
There are several readily available save-to-store components in the Screen Components menu, which simply store specified data to a designated field, e.g. a Save Accuracy component saves response accuracy to a chosen field. However, you might wish to customise the data saving to e.g. manipulate stored data by multiplying or dividing it by a given value. You can achieve this by creating your own data saver.
The data saver component below takes a source value and doubles it to create a destination value. The source and the destination are both expressed within the script as bindings.
What this means: when you add your custom component to a task, you can bind the source to anything (a spreadsheet column, a Store field, etc.), to select the value you want to double. You then bind the destination to the Store field where you want the result to be saved.

In the example, a Save Response component is first used to save the response on the current screen to a field called response. The Source of the Custom Saver component is then bound to this response field, meaning the script will take the current response as its input value. The Destination is bound to another field called response2 - this is where the doubled value output by the script will be stored.
To create the custom data saver, start by creating a new component with the Screen Component template:
First, we need to add the Binding class to our list of imported classes in the import command. We'll need this functionality to write to our destination field. We can delete the ProcessedResponse class as we won't be using it in this script.
Then, we need to add our component's settings to the factory. For this component, we need two settings: one for the source value, and one for the destination value.
Now we're ready to add the main body of our component's functionality within the @component block.
First, we add the construct() lifecycle method to our script. This is called when our component is first constructed (this is at the start of the Task, not the start of the current screen). Here, we create the two bindings our component is going to use. For this to work, we also need to declare member variables to create specific instances of our Binding object.
Next, still within the @component block, we add the apply() method and use it to pass our factory settings through to our bindings. source and destination are the names of your settings as defined in your component's factory.
Next, still within the @component block, we add the lifecycle method we want, based on when we want our component to take action. We want the value to be doubled at the end of the current screen, so we choose the lifecycle method screenFinish().
Within the screenFinish() lifecycle method, we read our source value using this.sourceBinding.read(), multiply it by 2, and use this.destBinding.write() to save the updated value to the destination field in the Store.
Finally, we need to add our settings to the editor registration. The field setting must match the name you gave the setting in your factory. The class must be one of the form field classes available in our scripting tools. For the destination binding, you must use FormElementBindableField to tell Gorilla that you want to bind to a destination, not a source:
For a worked example of a new data saving component see our Custom Data Saving Example.
Gorilla Tools' UI provides numerous components to select from when building your tasks or games. Components can be combined to build unique objects performing various functions - visit our Task Builder 2 Components Guide and Game Builder Components Guide to see what's currently available.
However, you might have specific research needs that require unique components. In this case, you can create your own task components and introduce new functionalities for your study. An example of a custom Task Component is a Click Handling component such as a hold/release button. See how to build one below:
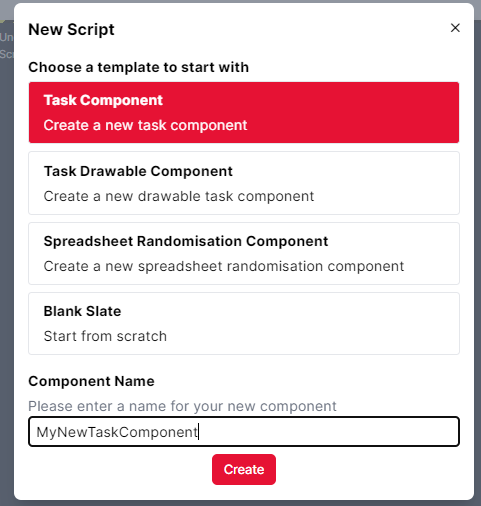
Start by creating a new component with the Task Component template:
We now need to manually add the construct(), screenStart(), and screenResponsesComplete lifecycle methods to the script. To do this, go to the construct(), screenStart(), and screenResponsesComplete() pages in the scripting guide, copy the code snippet, and paste it into your script inside the @component section.
You can now implement your logic in the construct(), screenStart() and screenResponsesComplete lifecycle methods:
For a worked example of a new task component see our Custom Task Component Example.
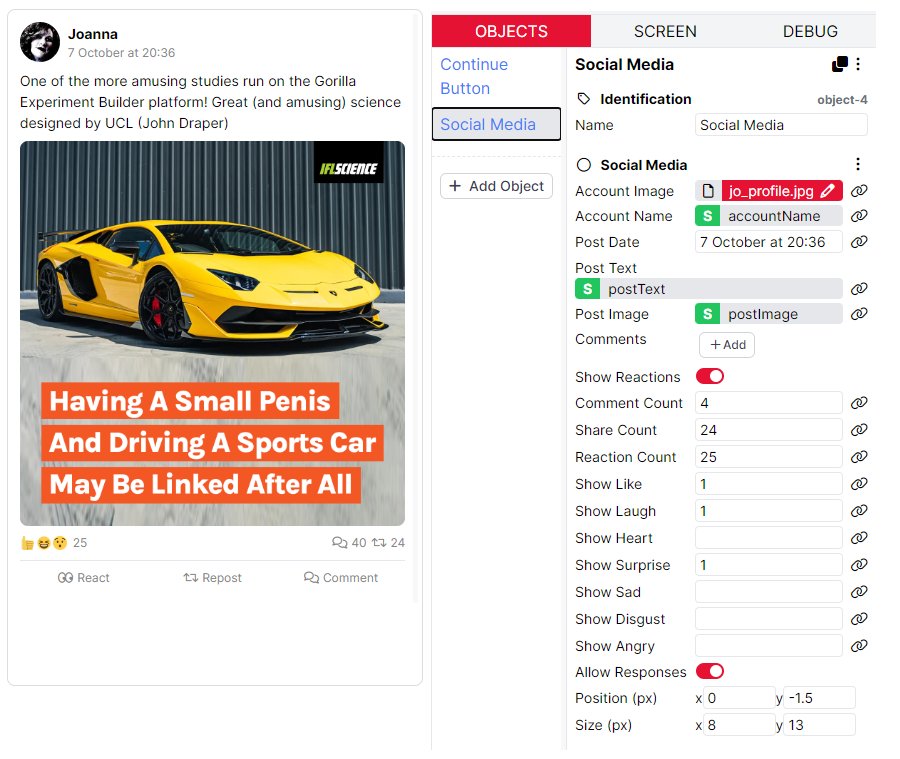
Once you are familiar with the Task Builder 2 scripting tools, you can use them to create any custom components you might need for your task. For example, the Instagram-style social media component shown in the screenshot below was built using Task Builder 2 scripting. This Instagram-style Social Media Component is available within the Task Builder 2 Scripting Samples project for you to preview and clone into your own projects.
You can also find a Facebook-style Social Media Component created using Task Builder 2 scripting on Open Materials.
Task Builder 2 Scripting Examples
Library of tasks with example scripting functionality
Form Fields Reference Guide
List of form fields you can use to connect your components to the Gorilla editor UI
Component Lifecycle Methods
Listing of all lifecycle methods you can use in your components
Types Reference
Listing of all types and interfaces used in the Gorilla system