Technical Checklist
- Stimuli
- Devices, Browsers, and Locations
Overview
This page draws together in one place the technical information you should be aware of before starting to run your study on Gorilla. It covers supported file types, guidance on maximum file sizes, and ways to ensure your participants are able to complete the experiment, whatever device or browser they are using. This information should help you to avoid many known issues when running your experiment. Read our guide on technical attrition to understand how technical issues can prevent participants from completing an experiment as expected.
By far the best way to avoid these issues is to preview and thoroughly test your experiment before recruiting participants. Preview the experiment across different devices and browsers; preview all conditions of your experiment, and download and check the data from each preview to make sure everything is recording as you intended. Recruit a few friends to do the experiment as 'real' participants to spot any issues that might only appear once the experiment goes live.
We do the best we can to make sure all important information is accessible on our support pages, but there is no substitute for thorough testing of your specific study!
Browse the list of topics in the menu to find out more.
File Types
When uploading your spreadsheet(s) and stimuli, using the file types listed below will help to ensure your experiment runs smoothly.
For spreadsheets, Gorilla supports the following file types:
.csv, .xlsx, .ods
For stimuli, we strongly recommend using the file types that are most widely supported by all browsers. These are:
Images: .png, .jpg, .jpeg, .gif, .svg
Please Note: we do not recommend the use of non-repeating GIFs. Gorilla pre-loads task material in advance of participants seeing it, so that when participants reach a new screen all page elements are ready to be displayed.
In the case of non-repeating GIFs, there is no way to tell a GIF when to 'start' playing. A non-repeating GIF will play through once and then stop on the last frame. As such, by the time a participant reaches the GIF, it may already have played through once and be sitting static on the last frame of the GIF. To avoid this we recommend using repeating GIFs, or turning your GIF into a Video.
For guidance on Image Scaling and how to make sure your images look how you want them to, see our guide on Formatting in Gorilla.
Audio: .mp3, .ogg
Please Note: Safari browser only offers partial support for .ogg files (and some older versions of Safari don't support ogg at all).
Video: .mp4
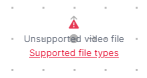
If you upload a video that is in an unsupported format or uses out-of-date encoding, you and/or the participant may see an 'unsupported video file' warning:
If you see this warning and your video file is already in .mp4 format, try using Handbrake, an open-source tool that can be used to convert older video files to a modern, widely supported format.
If your audio and video files are currently in a different format (e.g., .wav or .mov), we strongly recommend you convert them to one of the recommended formats listed above before uploading them to Gorilla. For audio, Audacity is an open-source tool that you can use to convert files to .mp3. For video, Handbrake or VLC Player are open-source tools that you can use to convert files to .mp4.
File Sizes
We recommend that the size of spreadsheet and stimuli files be kept as small as possible to ensure smooth running of experiments and minimise pre-loading delays. Specific guidelines will vary depending on how many stimuli you have in your task, but in general, we advise the following:
- No individual file should be larger than 10MB
- Each image file should be no larger than 50KB
- Audio and video files should be less than 2MB per minute
If you have very few stimuli in your task, it may be less of a problem to have one or two files that are larger than these constraints. Conversely, if you have very many stimuli in your task, you may need to reduce the size of each individual file further.
For guidance on Image Scaling and how to make sure your images look how you want them to, see our guide on Formatting in Gorilla.
To reduce the size of image files, you can use Squoosh or your preferred image editing software. For audio, Audacity is an open-source tool that includes the option to compress files. For video, Handbrake or VLC Player also offer this option.
Handbrake tutorial
Handbrake can be a tricky bit of software to get your head around. We've put together a tutorial that we've found covers the most useful features (with a bit of trial and error) when you're trying to compress video files without compromising on quality.
Once you've downloaded and installed Handbrake, open the software and select 'File - Open a single video file' and navigate to the video you want to compress. If you've got a lot of video stimuli to compress, it's useful to play around with the settings for one video first before you go ahead and compress them all. Once the video is in Handbrake, try the steps below. You can leave all other settings as the defaults unless you know what you're doing with them.
Summary tab:
- Set the 'Format' dropdown to .mp4
- Tick the 'Web Optimized' setting
Audio tab:
- Set the Bitrate to 128
Subtitles tab:
- Press 'Clear'
Chapters tab:
- Untick ‘Create chapter markers’
Video tab:
This tab is where a bit of trial and error comes in. On the Quality slider, a lower number means higher quality and a bigger file size. You'll need to get the balance right depending on your own stimuli, how you want it to look, how big the original file is, and the display size. The larger the display size of the video, the more noticeable any imperfections will be.
- Adjust the Constant Quality slider. Try increasing the RF by 1-2 (move the slider to the left) the first time you try to compress a video.
The 'Encoder Preset' slider is a setting you'll want to change at different points in your compression journey! Essentially, this slider changes how long it will take to process your file and give you a newer, compressed, version once you've finished altering all the settings. If you're just trialling out the quality setting above, you'll probably want to start off with it set to one of the faster settings. Making it faster (moving the slider to the left) means it will be finished processing quicker but it may not be as compressed or high quality as it could be. Make it slower (moving the slider to the right) means that it will take longer but will be better compressed. A faster setting is good whilst you're getting a feel for the results because the file can be processed quickly even on less powerful devices. But when you're happy with the settings and are running it for the final time, you'll want to go for the slowest (to the right) setting. Then, Handbrake will take its time processing your video but ensure better results.
- Set the 'Encoder Preset' slider. Try a faster setting when you're still trialling out the right Quality setting, and the slower setting when you're happy with your settings and are compressing the video for real.
Moment of truth!
- Press 'Start Encode' in the top toolbar.
This wil start the process of creating a new video based on all your settings. By default it will save in the same folder as your original video, but you can change this and the file name at the very bottom of the screen before you start encoding.
- Have a look at your new video and assess the quality of your video and the size of the file
If you're happy with the quality but not the file size, go back to the Video tab and try increasing the RF again (move the slider to the left). Repeat 'Start Encode'.
If you're happy with the file size but not the quality, go back to the Video tab and try decreasing the RF a little (move the slider back to the right). Repeat 'Start Encode'.
Repeat the process until you're happy with the quality and the file size. Make a note of the settings you used just in case! You can then repeat the process with all of your video files, but remember to change the 'Encoder preset' setting to be slower.
Autoplaying sound and video
Summary
If you want to play sound or video to your participants, there are some extra steps you may have to consider. Autoplay was disabled by default in all major browsers as of 2018. There are ways around it, but it's difficult to guarantee a solution.
If your participants play each audio or video file by clicking on something, such as the in-built 'Play' button, or by using Click Response with a Trigger - Active component, then you should be fine.
If your participants play each audio or video file by interacting with the keyboard, such as combining a Keyboard Response component with Trigger - Active to start the media, or by not interacting at all, for example if you use Trigger - Active with the Screen Start trigger, then you need to take extra steps (see 'Solutions' below).
Background
Since 2018, all the major browsers prevent autoplaying of audio files and video files with an audio track (hereafter referred to as audio-visual media) by default. Videos without an audio track, or with their audio track muted, will be allowed to autoplay. If a muted video is unmuted (and was autoplayed initially) it will immediately stop.
This means your participants must provide a 'direct interaction' to trigger audio-visual media to play. The most reliable way to force this direct interaction in a Gorilla task is through a mouse-click to start the audio-visual media (such as the Play button). A keyboard interaction doesn't have the same effect.
If a participant clicks the mouse once to start audio-visual media, this may then enable autoplay for future audio-visual media for that participant, but this is not always reliable.
At Gorilla, we've made autoplay of audio much more reliable by hiding a silent audio track in our systems. Any time a participant clicks the left mouse button, it secretly triggers the silent audio to play! This doesn't affect the participant experience at all. All you need to do is make sure there's a mouse click somewhere at the beginning of your task, such as a Continue button. When the participant clicks it, the silent audio will play, which may unlock audio autoplay for the rest of the task.
Solutions
1) Add a mouse click at the beginning of your task. This will trigger our secret silent audio track (see tip box above) and hopefully unlock autoplay. Importantly, this trick only works for audio and unfortunately doesn't work for video stimuli with an audio track.
2) Ensure the audio subsystem in your task is toggled on. This prompts the participant to press 'Play' on our own audio track (a voice saying "1, 2, 3") before your task starts, which may then unlock autoplay for the rest of your task.
3) If possible, have the participant press the 'Play' button with a mouse click to trigger each audio/video file. If this is not possible for your protocol, try solution 4) or 5).
4) Add an audio or video file to your instructions which the participant has to click 'Play' to play. This may unlock autoplay on Gorilla for that participant.
5) For videos, toggle on the 'Muted' setting in the Video component to unlock autoplay.
If the participant refreshes the page, or you have a longitudinal design which means they leave the experiment and come back later, autoplay permissions will be revoked. It's therefore worth having a mouse click at the beginning of every task to unlock the ability to autoplay audio-visual media again for later sessions in multi-part studies.
Frequently asked questions
Why did you make this change?
We didn't, the browser vendors did (e.g. Google, Apple, Microsoft, Opera...and more) and we were powerless to prevent it. Why did they make this change? To improve the overall user experience by preventing media/ad platforms from playing audio-visual media, without prompting, requiring the user to scour the site for where the blasted audio is coming from. Hurrah for user experience, RIP behavioural research.
Why do you keep using the word MAY?
If the participant has requested that their browser never allow audio-visual media to autoplayed then, regardless of what we or anyone else does, autoplaying will not be allowed, period! The default browser behaviour is to allow it after an interaction (as described above) but we are powerless in the case where a participant has changed the default settings on their device.
Can you detect if audio-visual media failed to play because of autoplay restrictions?
Not always. In cases where Gorilla is able to detect that autoplay failed, the participant will instead see a manual Play button that they can click to play the audio-visual media:

This will also be logged in the participant's data, where the Response column will contain the text Error playing video, user shown manual play button to continue.
Why do websites that I frequently visit have autoplaying audio-visual media?
Because you frequently visit them. The browser vendors build up a profile of your behaviour and, if you interact with audio-visual media enough times, it will assume that you're okay with audio-visual media being played and will allow autoplaying.
Devices
By default, participants will be able to access your experiment from any internet-enabled device (including desktops, laptops, tablets and mobile phones).
We recommend you thoroughly preview and test your experiment on any device you are planning to let participants use. In Task Builder 2, within the Screen Preview panel, you can preview what this screen will look like on a large monitor, small monitor, laptop, tablet and mobile devices. You can also use the Toggle button to switch between portrait and landscape preview. There is some further information about this in our How To guide. To improve the Layout of your tasks across different devices, you may consider using our Customisation Layout settings.
In Questionnaire Builder 2, within the Page Preview, you can preview what your questionnaire page will look like on a desktop/laptop and mobile devices.
If you know your experiment does not work well on a particular device type, you can prevent participants from accessing the experiment on this type of device by setting Requirements on the Recruitment tab of your experiment.
Note that device type checks are not infallible - in particular, modern Apple devices such as iPhones and iPads are able to identify themselves as computers. As such, if you need to exclude participants who are using a particular device type, we highly recommend that you also directly ask participants within the experiment what device they are using, and use a Branch Node to reject participants or send them on to your task on the basis of their answer.
If a participant using a mobile clicks your experiment link from within a mobile app (such as Facebook or Twitter), the experiment may open within the app, rather than in a full browser such as Safari or Chrome. This may prevent them from completing the experiment. If you are recruiting participants who will be using mobiles, we strongly recommend that you instruct them to copy and paste the link into their browser, rather than clicking it.
If your task requires a keyboard response, then we recommend restricting the device types for your experiment to stop participants from using mobile devices. This is because the phone keyboard would need to pop up and down on each screen and obscures the screen and may affect reaction times.
Watch the video below to learn how the Developer Tools in Chrome can be used to help view how your experiment may appear on different devices:
We also have built-in mobile device preview options in Questionnaire Builder 2 and Task Builder 2.
Browsers
By default, participants will be able to access your experiment from any browser.
For most simple experiments, the browser will not make a significant difference to participants' experience. However, if your experiment is more complex or you are using cutting-edge features, you may want to preview and test your experiment across multiple browsers. If you find that your experiment does not work well on a particular browser, you can prevent participants from accessing the experiment in this browser by setting Requirements on the Recruitment tab of your experiment.
If a participant using a mobile clicks your experiment link from within a mobile app (such as Facebook or Twitter), the experiment may open within the app, rather than in a full browser such as Safari or Chrome. This may prevent them from completing the experiment. If you are recruiting participants who will be using mobiles, we strongly recommend that you instruct them to copy and paste the link into their browser, rather than clicking it.
Connection Speeds
Participants in your experiment may have varying connection speeds. Gorilla's lookahead system, which downloads all stimuli for a trial before the trial starts, is designed to account for this: a participant's connection speed will not affect the accuracy of their measured reaction time.
However, if a participant's connection speed is slow and the experiment includes a lot of stimuli, very large stimuli files, or a combination of both, they may experience pauses between trials while these stimuli are loaded. The best way to solve this problem is to reduce the size of stimuli files to make them as small as possible - see the File Sizes section for more information.
You also have the option of preventing participants whose connection speed is below a certain level from accessing your experiment. You can do this by setting Requirements on the Recruitment tab of your experiment.
Mobile Apps
If a participant using a mobile clicks your experiment link from within a mobile app (such as Facebook or Twitter), the experiment may open within the app, rather than in a full browser such as Safari or Chrome. This may prevent them from completing the experiment. If you are recruiting participants who will be using mobiles, we strongly recommend that you instruct them to copy and paste the link into their browser, rather than clicking it.
Participant Location
Participants should be able to take part in studies hosted on Gorilla from anywhere in the world, as long as they have an internet connection and a browser. However, there are a couple of factors that might affect a participant's experience depending on which country they are located in:
- Distance from Europe. Gorilla's servers are currently based in the EU. So, at the moment, the further a participant is from the EU (in the absence of a high-speed undersea connection), the slower their connection and download speeds will be. This means that download times for participants in China, Australia, and other non-US countries that are geographically distant from the EU will be longer than download times for participants in Europe or the US.
- Use of VPNs. Use of VPNs (Virtual Private Networks) is more prevalent in some countries than others. If a participant is using a VPN, this can interfere with Gorilla contacting its servers to download content and stimuli and potentially cause disruption.
The effect of both of these factors will be more pronounced for experiments that include many large stimuli files such as videos.