How To: Language and Localisation
- Experiment Builder
- Questionnaire Builder 2
- Task Builder 2
- Questionnaire Builder 1
- Task Builder 1
Welcome to Language and Localisation in Gorilla
This page documents the localisation options available within Gorilla so that you can customise the language used across your experiment!
By default, all text is written in English.
Consult the list of topics in the menu to find the relevant area. If there is something you'd like to localise but can't, please consider adding to or up-voting an idea in our Roadmap!
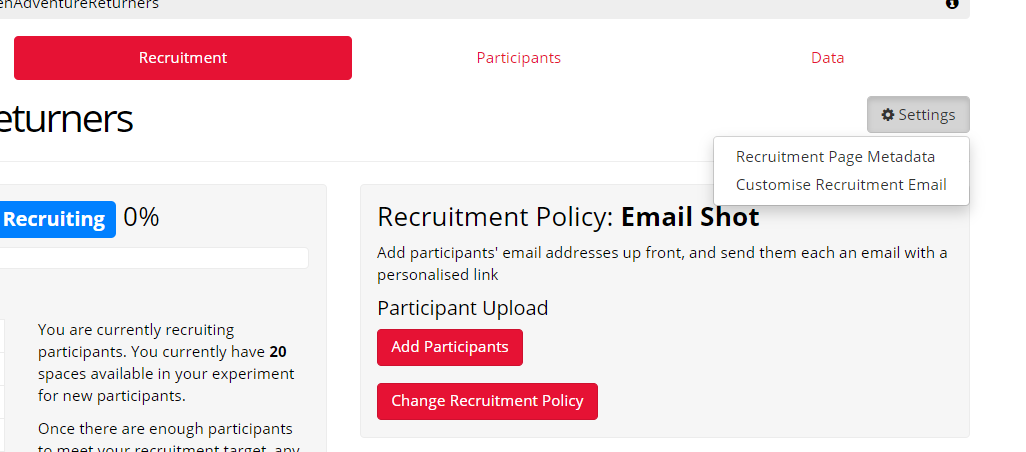
Email Recruitment
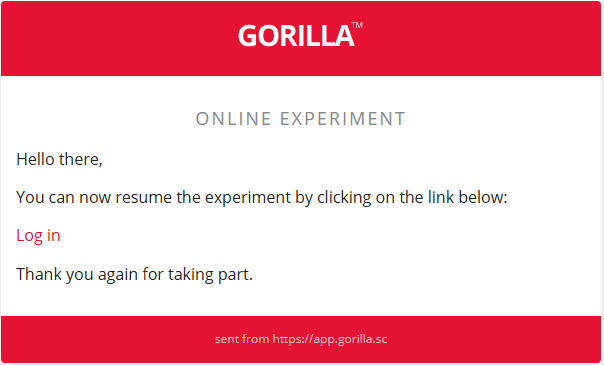
You can customise the recruitment email that is sent to participants for both the Email Shot and Email ID recruitment policies.
Fill in the Subject and Body boxes with customised information you wish to display to your participants. Make sure you include the tag {{url}} in your email where you would like to place the recruitment link. You can also add in the participant's name (as it appears in your Participants tab) using the tag {{name}}. The email can be further customised via HTML formatting.
Delay Node
The Delay Node prevents a participant from continuing your experiment until the specified time has elapsed.
When a participant reaches the Delay Node they will see a dialog box:

You can configure the heading and message you want to show in this dialog using the Heading/Title and Message fields in the Delay Node settings.
As part of the Delay Node, you can send reminder emails to participants when the delay has finished containing a link to the experiment.
This reminder email currently cannot be localised and will be in English.
For more information on reminder emails, please see our Delay Node guide.
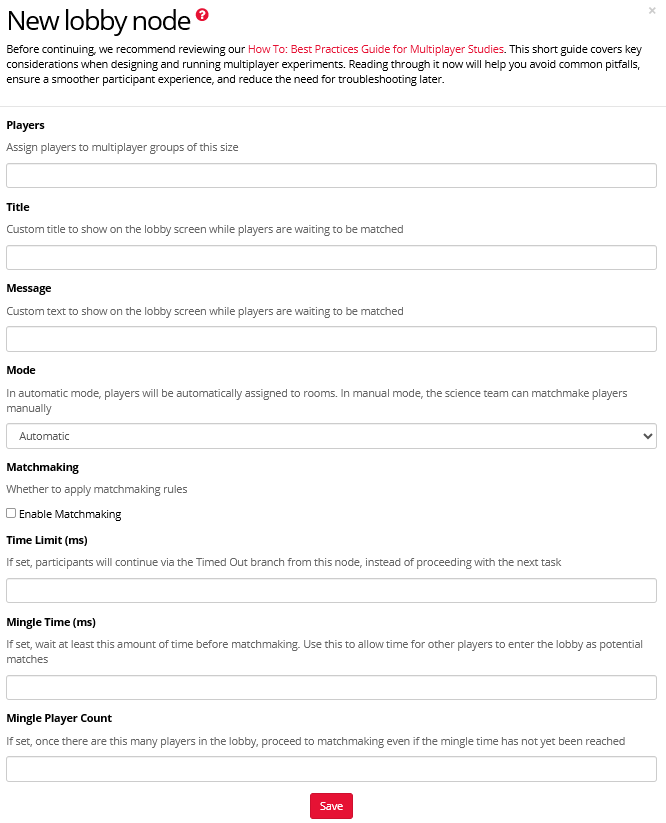
Lobby Node
This node is only available if you have access to Multiplayer. See our Pricing page for more information.
The Lobby Node is used in Multiplayer experiments to group together participants who are going to play together.
You can change the title and message displayed to participants while they wait. To change this, enter the Title and Message in your desired language.
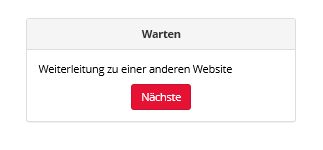
Redirect Node
The Redirect Node sends participants from Gorilla to an external site and back again.
You can change the title and message displayed to participants before they are redirected. First select, 'Show a message first' as the Redirection option. Then enter the Title, Message, and Button Text in your desired language.
Start and End Screens
In any experiment, the screens participants see before and after completing an experiment currently cannot be edited.
You won't see these screens when you preview your experiment but your participants will. Depending on your recruitment policy, they will look something like the below screenshot.
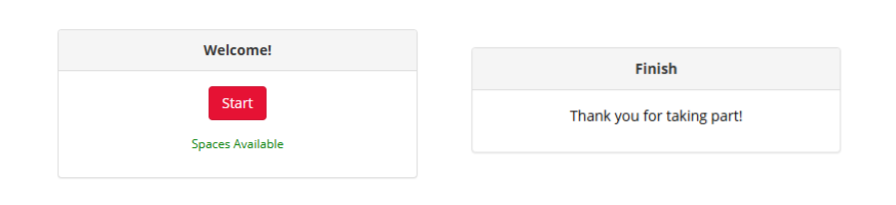
You can read more about Start Nodes and Finish Nodes in our Experiment Tree Nodes guide.
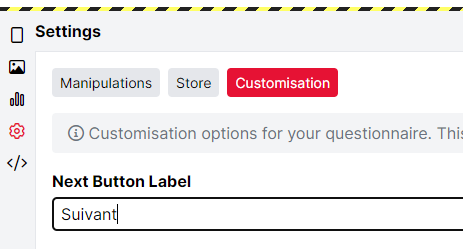
Next and Back Button
You can customise the text on the 'Next' label by altering your questionnaire's settings. On the left hand tab, go to the Settings icon, then to the Customisation tab and enter a new instruction or translation of your choice. You may need to refresh the page before the changes take effect.
You can also add a Back Button here, by toggling on the relevant setting. Again, you might want to change its name by customising the label.
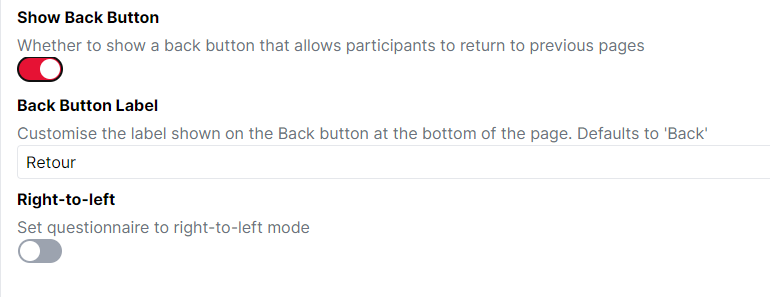
Right to Left Text
You can set the questionnaire to right-to-left mode, if the language you are using for it is written and read from right-to-left.
On the left hand tab, go to the Settings icon, then to the Customisation tab and toggle on Right-to-Left.

Questionnaire Objects
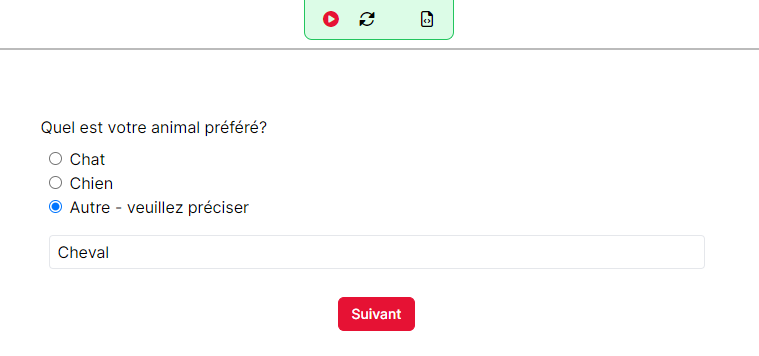
All objects allow you to enter your own question text, change any default text, or customise button labels (where applicable), so these can be easily localised as needed. Additionally objects that allow you to specify a prompt for text entry have the default text of 'Other - please specify', but this can be customised in any way, including into other languages.
The only objects that are not able to be localised at present are the Date Entry and Time Entry objects.
Right to Left Text
If you want to use text in a Markdown Text component that reads right-to-left, you can move your punctuation to the beginning of your sentences by using the unicode character ‫.
You can also select H Align -> Right to have your text be right aligned within a Markdown Text component. Alternatively, you can add <div style="text-align:right;">your text here</div> to align your text to the right. Task spreadsheet cells will also accept this formatting.
Components other than the HTML and Markdown Text components, cannot support Markdown or HTML so the text cannot be changed to right-to-left.
Multiple Languages
If you wish to recruit participants who speak different languages, you can use the Spreadsheet to make this easy and efficient within one Task!
First, create your task. Whenever you want text, make sure to bind this to the Spreadsheet. Write the text in the Spreadsheet in the first language you want participants to see.
Click '+ New Spreadsheet' to add a new Spreadsheet for your second language. Use the same column headings as your first spreadsheet. Fill in the cells of this spreadsheet with the second language you want participants to see. You will now have two spreadsheets both with the same column headings, but with different language content.
In the Experiment Builder, you can add the same Task twice and specify which spreadsheet to use. You can combine this with a Branch Node to direct participants to the task in their language.
See our How To guide for more information on using multiple spreadsheets!
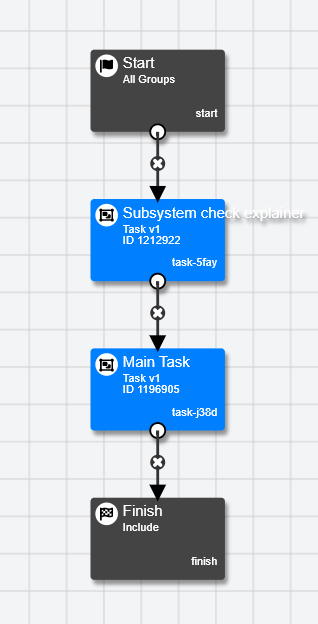
Subsystem Checks
Currently the Subsystem Checks cannot be localised and will always display in English. You can see what these checks are by previewing your task.
The Audio subsystem check can be turned off by going to Settings -> Subsystems and toggling off Audio. Other subsystem checks cannot be disabled as they are required for the task to function.
To minimise confusion for non-English speakers, you can add a Questionnaire or Task Node immediately before the Task containing the subsystem checks. In this other node, you can explain, in the relevant language, what participants will be asked to do and what the English text means.
AI Components
AI components are available by request as a premium add-on to any Gorilla subscription. To get access, email subscriptions@gorilla.sc.
If you don't have a subscription but would like to inquire about access to the AI components, email info@gorilla.sc.
You can customise the language an AI model uses within your task. You can do this with a System Prompt so that all content produced by the AI model is in your desired language.
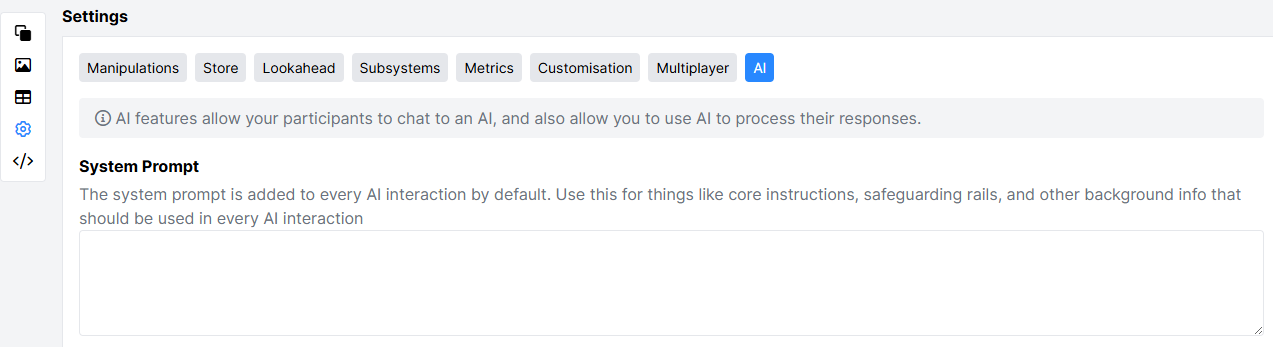
Adding a system prompt
To add a system prompt that should be used in every AI interaction within your task, click Settings on the left-hand sidebar and select AI:
The prompt you enter will be used by every AI in your task by default. To disable the system prompt for a specific AI component, open Additional Settings on the component and toggle on the 'Ignore System Prompt' setting.
Alternatively, you can enter your specific prompts, such as the Initiate Chat Box prompt, in your desired language and the AI model should reflect this and produce content in the same language.
As the content generated comes from an AI model outside of Gorilla, we cannot guarantee the AI model stays in the same language for the full experiment, especially if the participant responds in another language.
Button
The Button component adds a standard HTML button. You'll need to add another component to this object to make it do anything, for example, the Click To Continue component or the Click Response component.
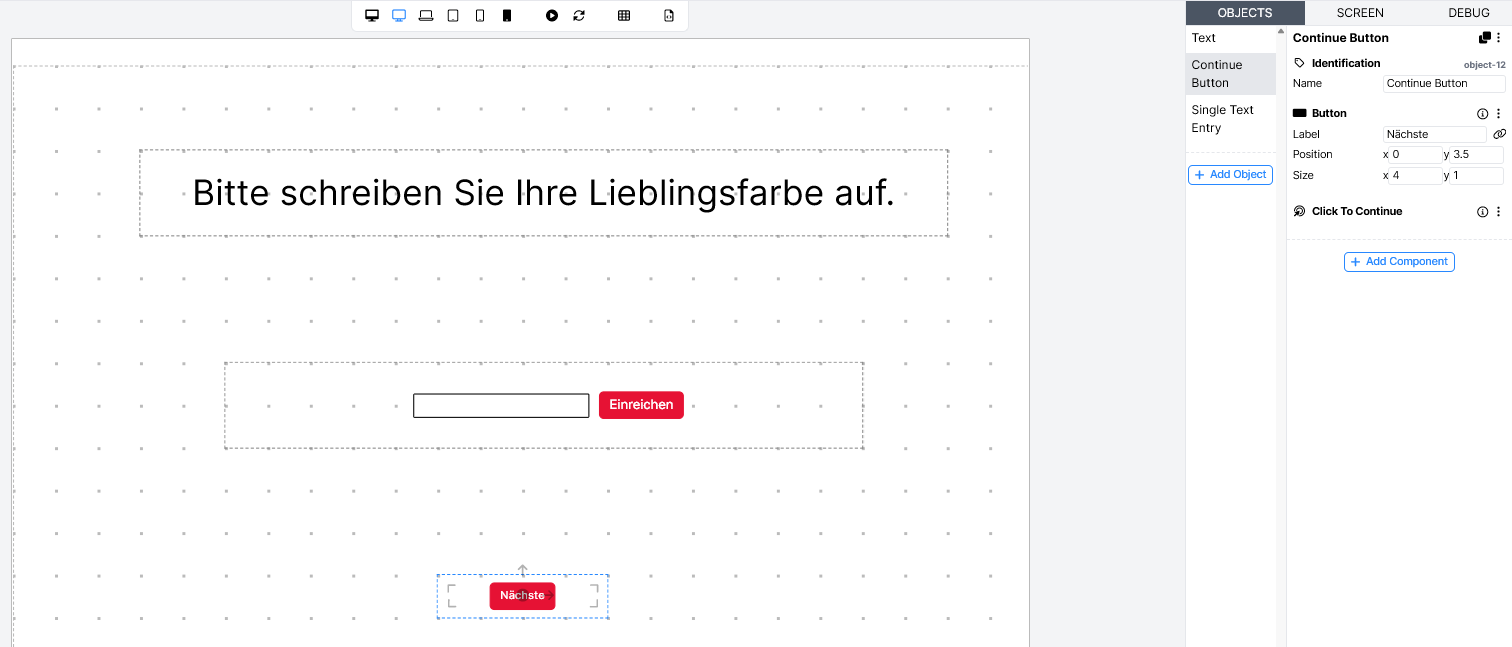
You can change the default text used in the Label, by entering text in the language you'd like to use. If you use the Continue Button prefab, it defaults to 'Next'.
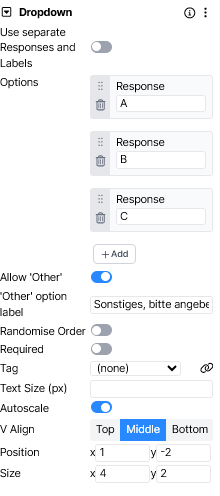
Dropdown
The Dropdown component adds a simple dropdown menu, from which the participant can select one answer from the set of options you provide.
If you toggle on 'Allow Other', participants can select this option then type their response. By default, this component uses 'Other - please specify:'. You can change the the 'Other' option label by entering text in the language you'd like to use.
Eye Tracking (Webgazer)
The Eye Tracking (Webgazer) component allows you to add basic eye tracking functionality to your task using a participant's webcam.
When using the Calibrate mode, you can change the successful, failed, retry, and finish texts from their English defaults by toggling on 'Enable Localisation' and entering text in the language you'd like to use.
Markdown Text
Whenever you're using a Markdown Text component, you can enter text in whichever language you like! This includes adding accents to letters.
You can also change the text to be right to left.
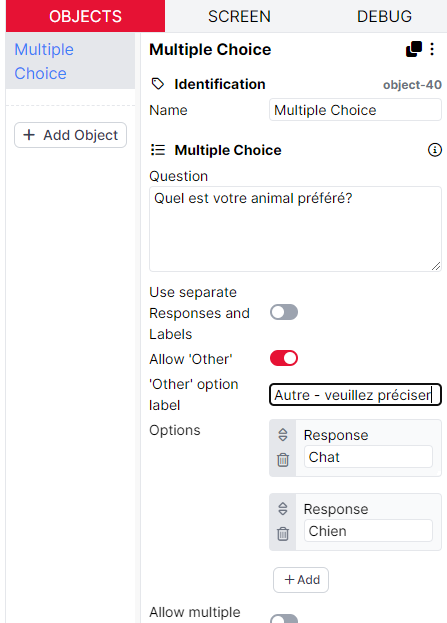
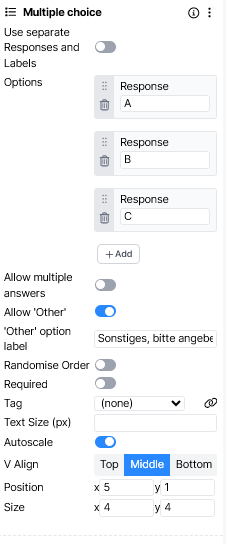
Multiple Choice
The Multiple Choice component allows the participant to choose from a list of pre-defined options. If multiple answers are allowed, the options will be presented as a checklist. If only one option can be chosen by participants, they will be displayed as radio buttons.
If you toggle on 'Allow Other', participants can select this option then type their response. By default, this component uses 'Other - please specify:'. You can change the the 'Other' option label by entering text in the language you'd like to use.
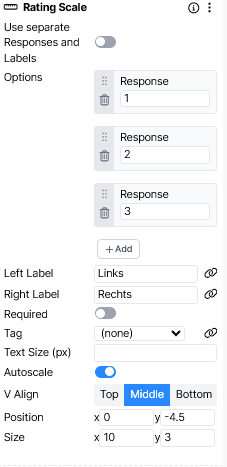
Rating Scale
The Rating Scale component adds one set of Likert-style choices, from which participants can pick a single option. Participants can change their mind and select a different option before submitting their final response.
By default, this component uses 'Left' and 'Right' as labels. You can change these labels by entering text in the language you'd like to use.
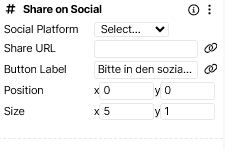
Share on Social
The Share on Social component allows the participant to share a link you provide on a social media platform (currently LinkedIn or Facebook).
This component creates a button the participant can click. The button features the logo of your chosen platform and a message that can be customised by entering text in the language you'd like to use.
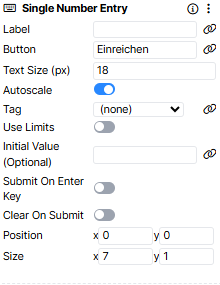
Single Number Entry
The Single Number Entry component allows the participant to enter a number into a text box and submit it using the Submit button.
The text on the Submit button can be edited by entering text in the language you'd like to use.
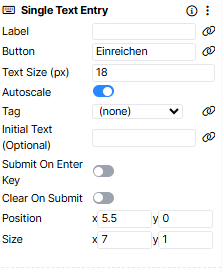
Single Text Entry
The Single Text Entry component allows the participant to enter text into a text box and submit it using the Submit button.
The text on the Submit button can be edited by entering text in the language you'd like to use.
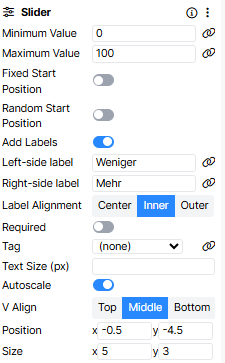
Slider
The Slider component lets you add a simple slider. The participant can drag the slider to a value within the range you set. The range defaults to 0 - 100.
If you toggle on 'Add Labels', you can edit the left and right side labels to be in your desired language.
Next Button
You can localise the content of your questionnaire by altering the questionnaire options. These can be found via the settings menu, next to the preview questionnaire button. Once you click on these, a pop-up window like the one below will appear.
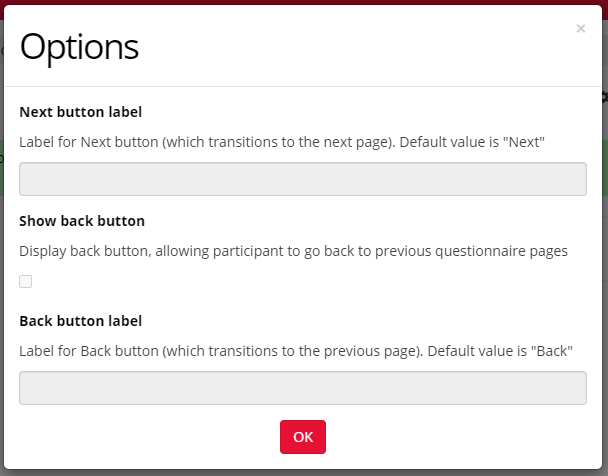
Next button label
Any text can be typed in the setting to be displayed to the participant. You can change the default text from English by providing the translation in the language you'd like to use.
Back button label
This setting is only applicable when the 'show back button' option is turned on. Any text can be typed in the setting to be displayed to the participant. You can change the default text from English by providing the translation in the language you'd like to use.
Questionnaire widgets
The Questionnaire widgets allow you to enter your own question text, and option text, so these can be localised as needed.
Additionally, the following widgets allow you to specify a prompt for text entry options:
- The Dropdown widget
- The Checklist widget
- The Radio Button widget
The Switch Button widget and Early Exit Button widget allow you to enter your own button label.
Unfortunately, the following cannot yet be localised in the Questionnaire Builder:
- Prompt messaging to tell participants that they need to answer all questions to continue - this message text is fixed in English. If you do not wish this message to be shown to participants, use widgets that allow you to select 'Allow missing'.
- The Date Entry widget cannot be localised - month names are shown in English, and the order of Day/Month/Year cannot be altered.
- The Height Entry and Weight Entry widgets ask participants to select metric or imperial units, and these are named in English.
Language in Task Builder 1
You can localise the content of your task by manipulating the localisation settings in multiple task builder zones. See the menu for the list of the zones that you can localise and click through each of these to see more information on settings and examples.
Audio Recording Zone
The Audio Recording Zone allows you to record audio from your participants by utilising the participant’s microphone. This zone is in BETA, meaning it is still under development.
For more information, examples, demos and zone configuration settings visit the Task Builder Zones Tooling Reference Guide.
This zone can be localised: see the details of the Localisation Settings below. You can change the default text from English by writing in the translation in the language you'd like to use.
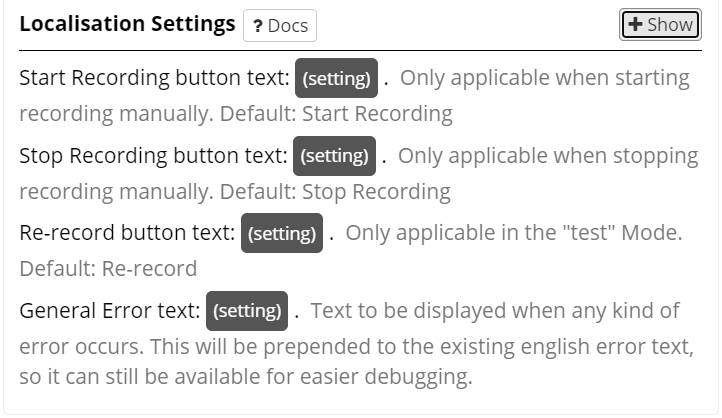
1) Start Recording button text: (setting) .
This setting is only applicable when starting recording manually.
Any text can be typed in the (setting) to be displayed to the participant.
By default the text says: 'Start Recording'.
2) Stop Recording button text: (setting) .
This setting is only applicable when stopping recording manually.
Any text can be typed in the (setting) to be displayed to the participant.
By default the text says: 'Stop Recording'.
3) Re-record button text: (setting) .
This setting is only applicable in the "test" Mode.
Any text can be typed in the (setting) to be displayed to the participant.
By default the text says: 'Re-record'.
4) General Error text: (setting) .
Text to be displayed when any kind of error occurs, advising participant on how to proceed.
Any text can be typed in the (setting) to be displayed as an error message to the participant.
This will be prepended to the existing english error text, so it can still be available for easier debugging.
Web Audio Zone
The Web Audio Zone allows you to add a single uploaded audio (sound) file to your screen. It is very similar to the Audio Zone, but is designed to work well with autoplay.
For more information, examples, demos and zone configuration settings visit the Task Builder Zones Tooling Reference Guide.
This zone can be localised: see the details of the Localisation Settings below. You can change the default text from English by writing in the translation in the language you'd like to use.
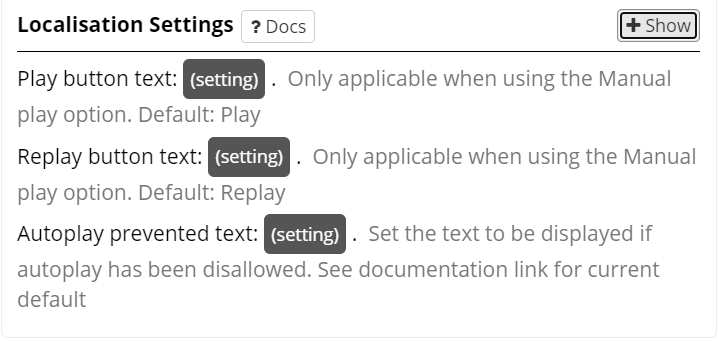
1) Play button text: (setting) .
This setting is only applicable when using the Manual play option.
Any text can be typed in the (setting) to be displayed to the participant.
By default the text says: 'Play'.
2) Replay button text: (setting) .
This setting is only applicable when using the Manual play option.
Any text can be typed in the (setting) to be displayed to the participant.
By default the text says: 'Replay'.
3) Autoplay prevented text: (setting) .
Set the text to be displayed if autoplay has been disallowed.
Any text can be typed in the (setting) to be displayed to the participant.
The current default text is: 'Your device does not permit autoplay. Click here to play!'.
Eye Tracking Zone
The Eye Tracking Zone allows you to add basic eye tracking functionality to your task by utilising a participant's webcam. This feature is currently in Closed-Beta, meaning it is still under development.
For more information, examples, demos and zone configuration settings visit the Task Builder Zones Tooling Reference Guide.
This zone can be localised: see the details of the Localisation Settings below. You can change the default text from English by writing in the translation in the language you'd like to use.
1) Eye Tracking Title text: (setting) .
This setting is only applicable in calibrate mode.
Any text can be typed in the (setting) to be displayed to the participant.
By default the text says: 'Eye Tracker'.
2) Start Calibration/Validation button text: (setting) .
This setting is only applicable in calibrate mode.
Any text can be typed in the (setting) to be displayed to the participant.
By default the text says: 'Start Calibration/Validation'.
3) End Calibration button text: (setting) .
This setting is only applicable in calibrate mode.
Any text can be typed in the (setting) to be displayed to the participant.
By default the text says: 'End Calibration'.
4) Inaccurate Calibration text: (setting) .
This setting is only applicable in calibrate mode.
It is displayed when the participants calibration failed to meet the standard required.
Any text can be typed in the (setting) to be displayed to the participant.
By default the text says: 'Unfortunately, that calibration wasn't accurate enough'.
5) Retry Calibration button text: (setting) .
This setting is only applicable in calibrate mode.
Any text can be typed in the (setting) to be displayed to the participant.
By default the text says: 'Retry Calibration'.
The main instructions can be set by entering text into the zone itself!
Eye Tracking 2 Zone
The Eye Tracking 2 Zone allows you to add basic eye tracking functionality to your task by utilising a participant's webcam. This feature is currently in Closed-Beta, meaning it is still under development.
For more information, examples, demos and zone configuration settings visit the Task Builder Zones Tooling Reference Guide.
This zone can be localised: see the details of the Localisation Settings below. You can change the default text from English by writing in the translation in the language you'd like to use.
1) Eye Tracking Title text: (setting) .
This setting is only applicable in calibrate mode.
Any text can be typed in the (setting) to be displayed to the participant.
By default the text says: 'Eye Tracker'.
2) Start Calibration/Validation button text: (setting) .
This setting is only applicable in calibrate mode.
Any text can be typed in the (setting) to be displayed to the participant.
By default the text says: 'Start Calibration/Validation'.
3) End Calibration button text: (setting) .
This setting is only applicable in calibrate mode.
Any text can be typed in the (setting) to be displayed to the participant.
By default the text says: 'End Calibration'.
4) Inaccurate Calibration text: (setting) .
This setting is only applicable in calibrate mode.
It is displayed when the participants calibration failed to meet the standard required.
Any text can be typed in the (setting) to be displayed to the participant.
By default the text says: 'Unfortunately, that calibration wasn't accurate enough'.
5) Retry Calibration button text: (setting) .
This setting is only applicable in calibrate mode.
Any text can be typed in the (setting) to be displayed to the participant.
By default the text says: 'Retry Calibration'.
6) Max Calibration Failures text: (setting) .
This setting is only applicable in calibrate mode and when using the maximum calibration failures setting.
It is displayed when the participant's calibration has failed the number of times specified by the maximum calibration failures setting.
Any text can be typed in the (setting) to be displayed to the participant.
By default the text says: 'Unfortunately, that calibration wasn't accurate enough and you've reached the maximum number of tries'.
7) Max Calibration Failures button text: (setting) .
This setting is only applicable in calibrate mode and when using the maximum calibration failures setting.
Any text can be typed in the (setting) to be displayed to the participant.
By default the text says: 'End Calibration'.
The main instructions can be set by entering text into the zone itself!
Screen Calibration Zone
This zone allows you to ask your participants to calibrate their monitor, permitting stimuli to be presented in either Centimetres or Visual Angle (degrees). This zone is in BETA, meaning it is still under development.
For more information, examples, demos and zone configuration settings visit the Task Builder Zones Tooling Reference Guide.
This zone can be localised: see the details of the Localisation Settings below. You can change the default text from English by writing in the translation in the language you'd like to use.
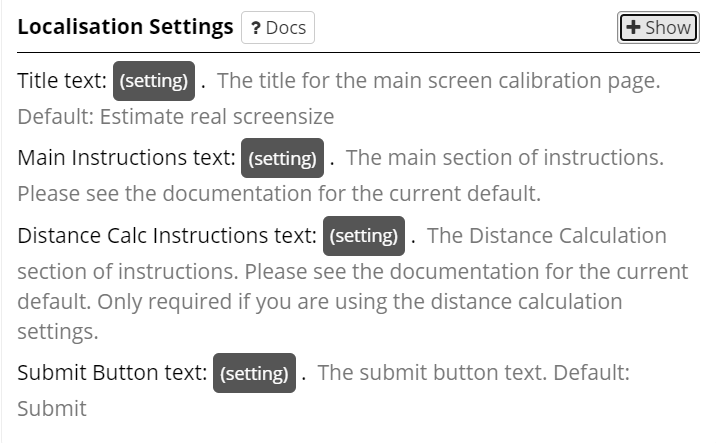
1) Title text: (setting) .
This is the title for the main screen calibration page.
Any text can be typed in the (setting) to be displayed to the participant.
By default the text says: 'Estimate real screensize'.
2) Main Instructions text: (setting) .
This is the main section of instructions.
Any text can be typed in the (setting) to be displayed to the participant.
The current default text is: 'To try and approximate the size of your screen in 'real world' coordinates, please put a standard size credit card on the screen. Then drag the slider so the image on the screen matches your card. Then press submit.'
3) Distance Calc Instructions text: (setting) .
This is the Distance Calculation section of instructions. It is only required if you are using the distance calculation settings.
Any text can be typed in the (setting) to be displayed to the participant.
The current default text is: 'Please sit around 50cm from your screen. If you wish to use another distance, enter it using the slider below!'
4) Submit Button text: (setting) .
This is the submit button text.
Any text can be typed in the (setting) to be displayed to the participant.
By default the text says: 'Submit'.
Keyboard Hold/Release Zone
Keyboard Hold/Release Zone is an advanced response zone which allows you to record advanced key responses, such as when a key is held down for a duration (Hold) or when a held key is released (Release).
For more information, examples, demos and zone configuration settings visit the Task Builder Zones Tooling Reference Guide.
This zone can be localised: see the details of the Localisation Settings below. You can change the default text from English by writing in the translation in the language you'd like to use.
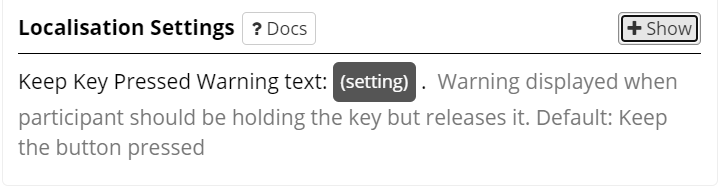
1) Keep Key Pressed Warning text: (setting).
A warning is displayed when participant should be holding the key but releases it.
Any text can be typed in the (setting) to be displayed as a warning for the participant.
By default the text says: 'Keep the button pressed'.
Video Zone
The Video Zone allows you to add a single uploaded video file to your screen.
For more information, examples, demos and zone configuration settings visit the Task Builder Zones Tooling Reference Guide.
This zone can be localised: see the details of the Localisation Settings below. You can change the default text from English by writing in the translation in the language you'd like to use.
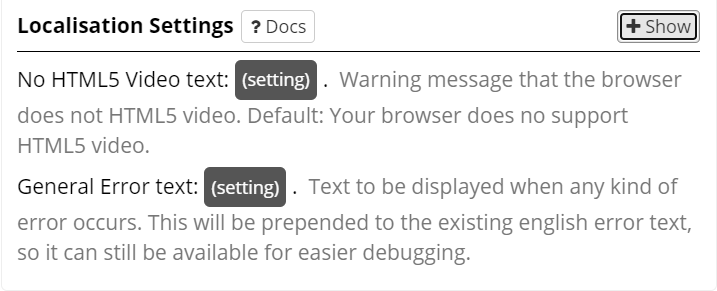
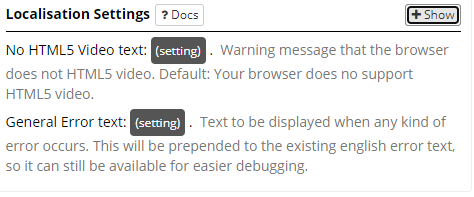
1) No HTML5 Video text: (setting) .
Warning message that the browser does not support HTML5 video.
Any text can be typed in the (setting) to be displayed as a warning for the participant.
By default the text says: 'Your browser does no support HTML5 video'.
2) General Error text: (setting) .
Text to be displayed when any kind of error occurs, advising participant on how to proceed.
Any text can be typed in the (setting) to be displayed as an error message to the participant.
This will be prepended to the existing english error text, so it can still be available for easier debugging.
Video Feed Zone
The Video Feed Zone allows you present participants with the feed from their webcam and to capture still images using the webcam. This feature is currently in Closed-Beta, meaning it is still under development.
For more information visit the Task Builder Zones Tooling Reference Guide.
This zone can be localised: see the details of the Localisation Settings below. You can change the default text from English by writing in the translation in the language you'd like to use.
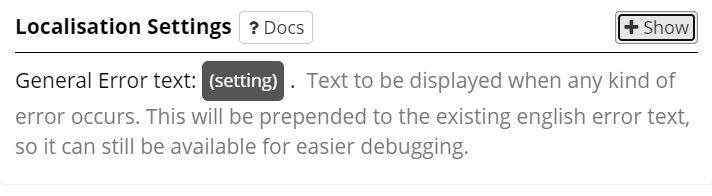
1) General Error text: (setting) .
Text to be displayed when any kind of error occurs, advising participant on how to proceed.
Any text can be typed in the (setting) to be displayed as an error message to the participant.
This will be prepended to the existing english error text, so it can still be available for easier debugging.
Video Recording Zone
The Video recording zone allows you to create video files of your participants, via their web cams. This feature is currently in Closed-Beta, meaning it is still under development.
For more information, examples, demos and zone configuration settings visit the [Task Builder Zones Tooling Reference Guide]/support/tools/legacy-tools/task-builder-1/task-builder-zones#videorecording).
This zone can be localised: see the details of the Localisation Settings below. You can change the default text from English by writing in the translation in the language you'd like to use.

1) Start Recording button text: (setting) .
This setting is only applicable when starting recording manually.
Any text can be typed in the (setting) to be displayed to the participant.
By default the text says: 'Start Recording'.
2) Stop Recording button text: (setting) .
This setting is only applicable when stopping recording manually.
Any text can be typed in the (setting) to be displayed to the participant.
By default the text says: 'Stop Recording'.
3) Re-record button text: (setting) .
This setting is only applicable in the "test" Mode.
Any text can be typed in the (setting) to be displayed to the participant.
By default the text says: 'Re-record'.
4) General Error text: (setting) .
Text to be displayed when any kind of error occurs, advising participant on how to proceed.
Any text can be typed in the (setting) to be displayed as an error message to the participant.
This will be prepended to the existing english error text, so it can still be available for easier debugging.
Embedded YouTube Zone
The Embedded YouTube Zone allows you to present a single YouTube video on your screen.
For more information, examples, demos and zone configuration settings visit the Task Builder Zones Tooling Reference Guide.
This zone can be localised: see the details of the Localisation Settings below. You can change the default text from English by writing in the translation in the language you'd like to use.
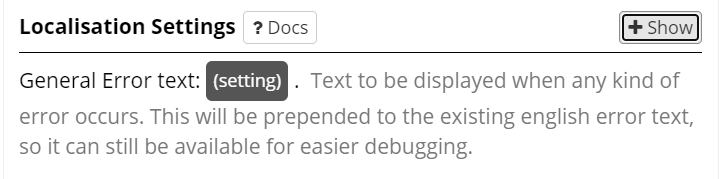
1) General Error text: (setting) .
Text to be displayed when any kind of error occurs, advising participant on how to proceed.
Any text can be typed in the (setting) to be displayed as an error message to the participant.
This will be prepended to the existing english error text, so it can still be available for easier debugging.
Go/No-Go (Video)
The Go/No-Go (Video) Zone is specialised for implementing video go/no-go style experimental paradigms. This specialised Zone allows you to present a video stimuli, while allowing the recording of a 'NoGo' response or an 'inhibited' response as a named response.
For more information, examples, demos and zone configuration settings visit the Task Builder Zones Tooling Reference Guide.
This zone can be localised: see the details of the Localisation Settings below. You can change the default text from English by writing in the translation in the language you'd like to use.
1) No HTML5 Video text: (setting) . This is a warning message showing when the browser does not support the HTML5 video.
Any text can be typed in the (setting) to be displayed to the participant.
By default the text says: 'Your browser does no support HTML5 video.'
2) General Error text: (setting) . This is a text displayed when any kind of error occurs.
Any text can be typed in the (setting) to be displayed to the participant.
This will be prepended to the existing english error text, so it can still be available for easier debugging.