This page guides you through the Design tab of the Experiment Builder. Check out the topics in the menu for walkthroughs of specific features.
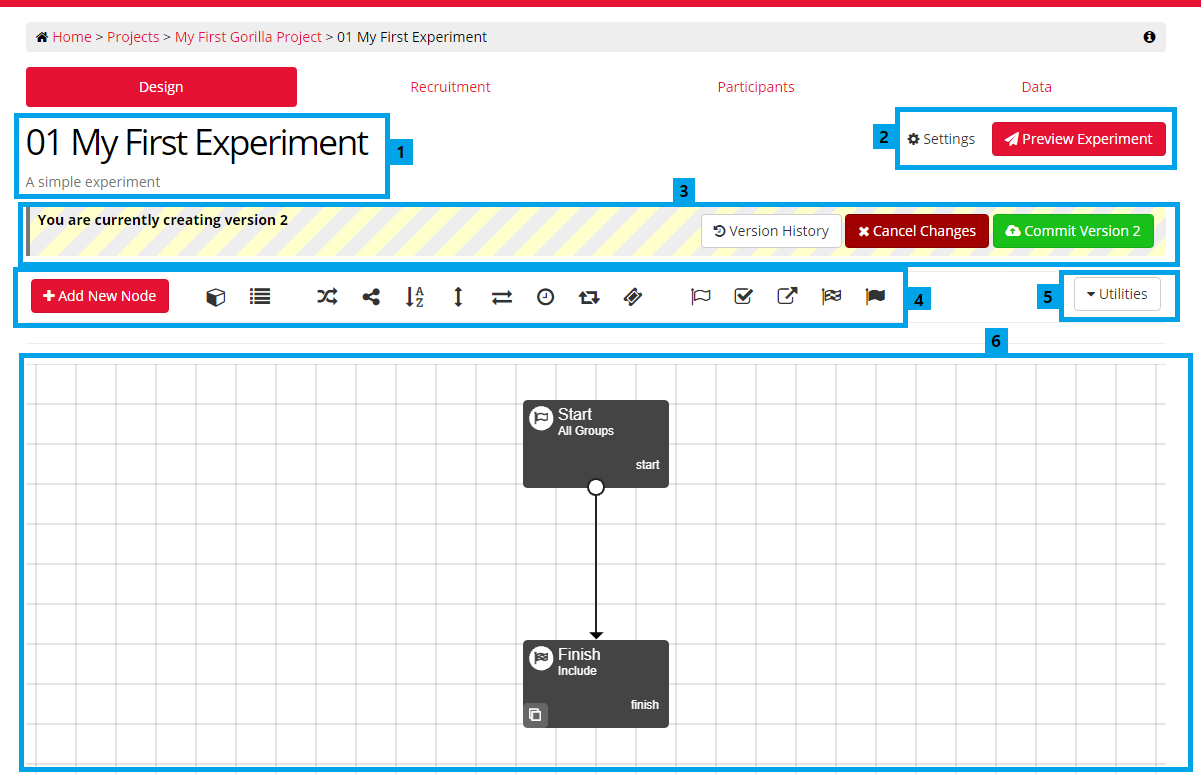
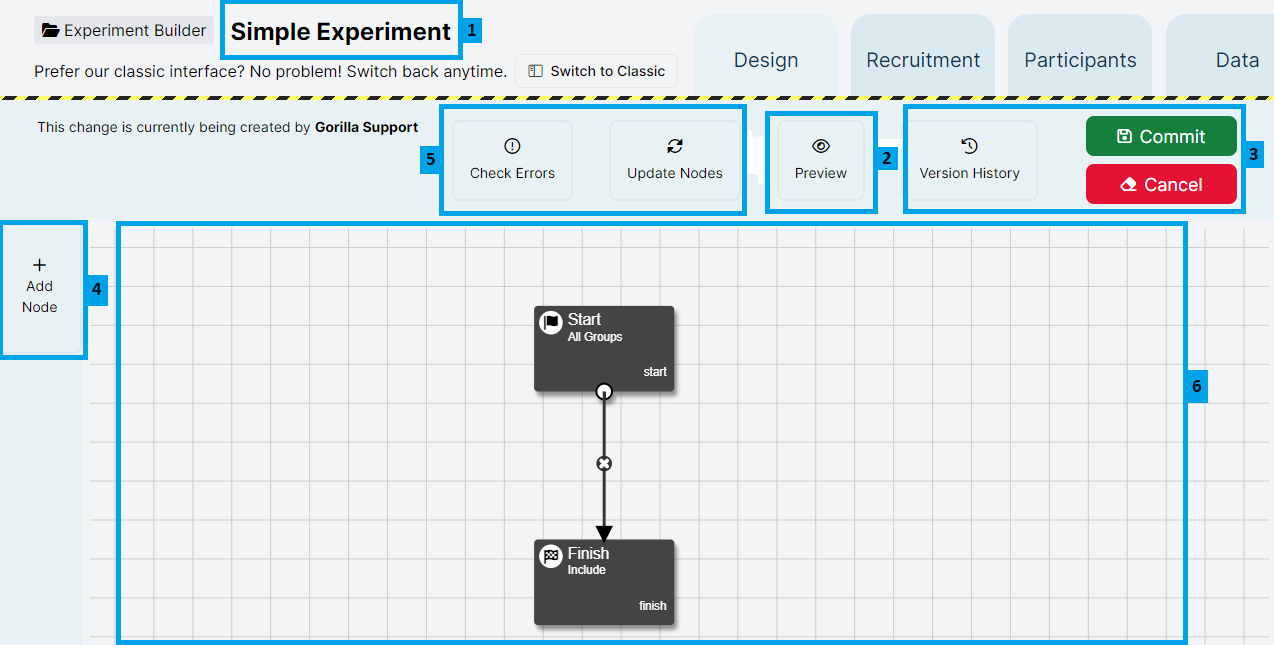
The screenshot and description below shows New Experiment Builder. If you are still using Classic Experiment Builder, open the expandable section.
To find this guide useful, you should have added your Task and Questionnaire Nodes to an experiment tree. If you haven't done this yet, read more about how to build an experiment.
Once you have added your tasks and questionnaires to your experiment, you may want to consider adding Control Nodes to your experiment. These nodes allow you to manipulate the path of participants through your experiment. For example, you may want to randomise participants to two different conditions of your experiment - this can be achieved by adding a Randomiser Node.
Checkpoint Nodes are also incredibly useful nodes to add to your experiment. These allow you to keep track of Participant progress throughout your experiment. Checkpoint Nodes can be helpful in tracking participants returning to your study in longitudinal or multi-part studies, or helping judge when to manually include participants in your dataset.
You can find more information about the available Experiment Nodes in our Experiment Tooling Reference Guide.
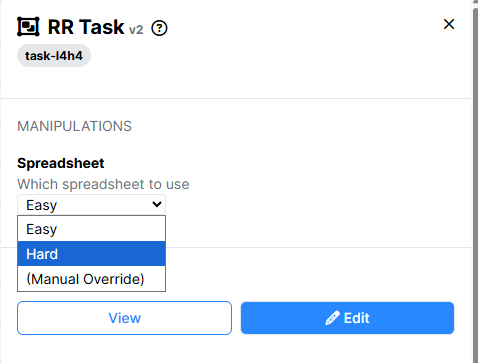
If you are using multiple spreadsheets or manipulations within your tasks, these will all need to be set within the Task Node at the experiment level.
You can add as many spreadsheets to your task as you wish. You may want to use multiple spreadsheets to show participants a different set of stimuli, for example. You can find some more information about how to add multiple spreadsheets in your task in our How-To guide.
If you would like to set a specific spreadsheet to a specific instance of the task, you will need to click on the Task Node within the experiment tree, and choose the spreadsheet from the Spreadsheet dropdown.
The screenshots on this page show the new Experiment Builder interface. If you’re still using the classic interface, it will appear slightly different.
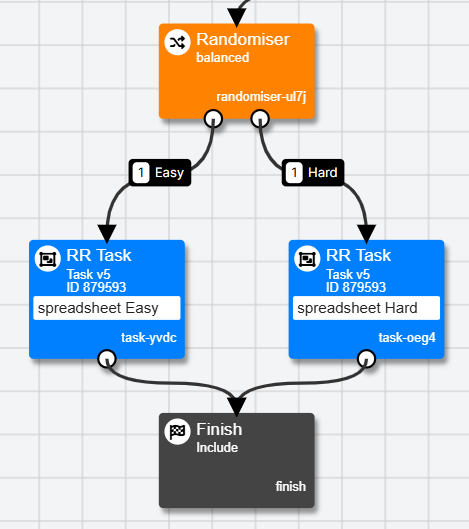
Once you have selected which spreadsheet you would like to use for more than one node, you will be able to see the spreadsheet associated with each task at the experiment tree level.
If you do not set up the spreadsheet at the task node level in this way, the first spreadsheet in the list will be used by default.
If you have a larger number of spreadsheets, setting the spreadsheet for each task individually can lead to a very large experiment tree which can be difficult to manage. In this case, we would recommend using a Counterbalance Node to assign participants to different spreadsheets within the same task node.
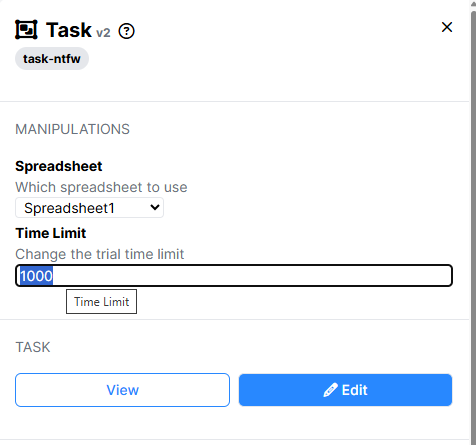
If you have set up manipulations within your task, you will need to configure these at the experiment level before participants start your experiment.
To configure the manipulation at the experiment, click on the task node. When you click on the task node, you will be able to see the Task Manipulation in the window. This will include the name and description you have set for the Manipulation. Then, from the dropdown or in the free text field, you can set the value you would like to use for each task.
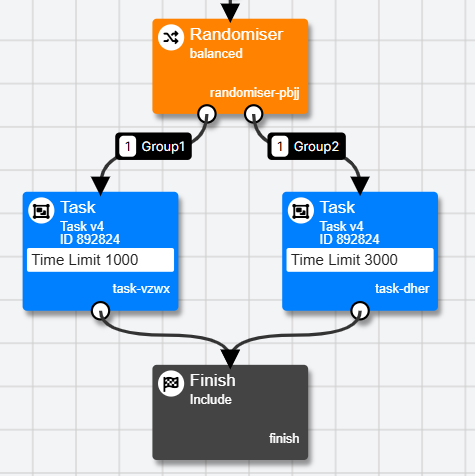
Once you have set Manipulations for more than one task node, you will be able to see which manipulation has been set for each task, as shown below.
If you do not set the manipulations in this way, the default value of the manipulation will be used for every participant.
Before you get ready to launch your experiment, there are a few things we recommend doing to check your experiment works properly.
Previewing your experiment is the best way to see what your experiment will look like to your participants. You can preview your experiment as many times as you want to!
The screenshot below shows New Experiment Builder. If you are still using Classic Experiment Builder, open the expandable section.
In Classic Experiment Builder, click the red 'Preview Experiment' button at the top right:

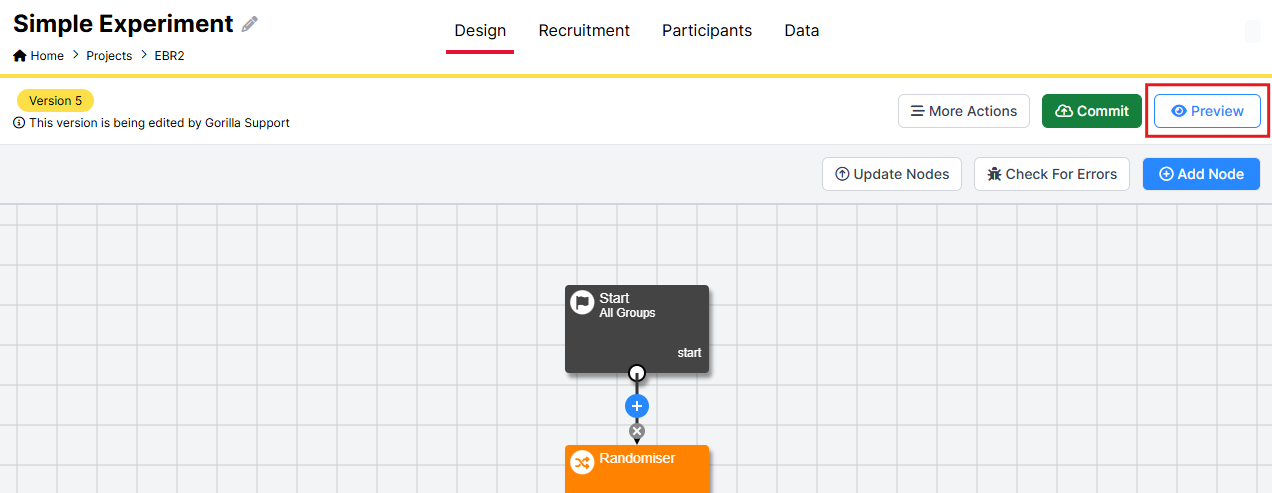
In New Experiment Builder, click the white and blue Preview button at the top right:
At the end of the preview, you will be given the opportunity to download the data from that preview. This is a great way to check your data, and make sure all the relevant data that you need for your analysis are being recorded.
If your experiment preview doesn't look how you expect, a good first step is to check if any of the nodes in your experiment tree are out-of-date.
In New Experiment Builder, you can see this at a glance by looking at the task and questionnaire nodes in your experiment.
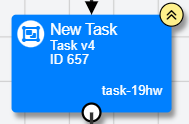
A node that has an open edit will appear with a yellow pencil icon at the top-right:
To commit changes to this and all other nodes and update them within the experiment:
To commit changes only to this node:
A node that is not open for edit, but is using an old version, will appear with two upward arrows at the top-right:
To update this and all other nodes:
To update only this node:
When you are happy with how your experiment works, be sure to commit this version of the experiment. When you recruit participants, they will enter the latest committed version of the experiment.
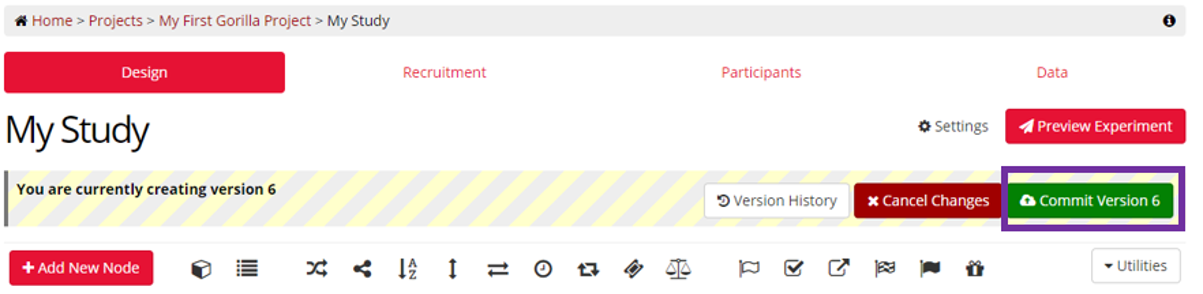
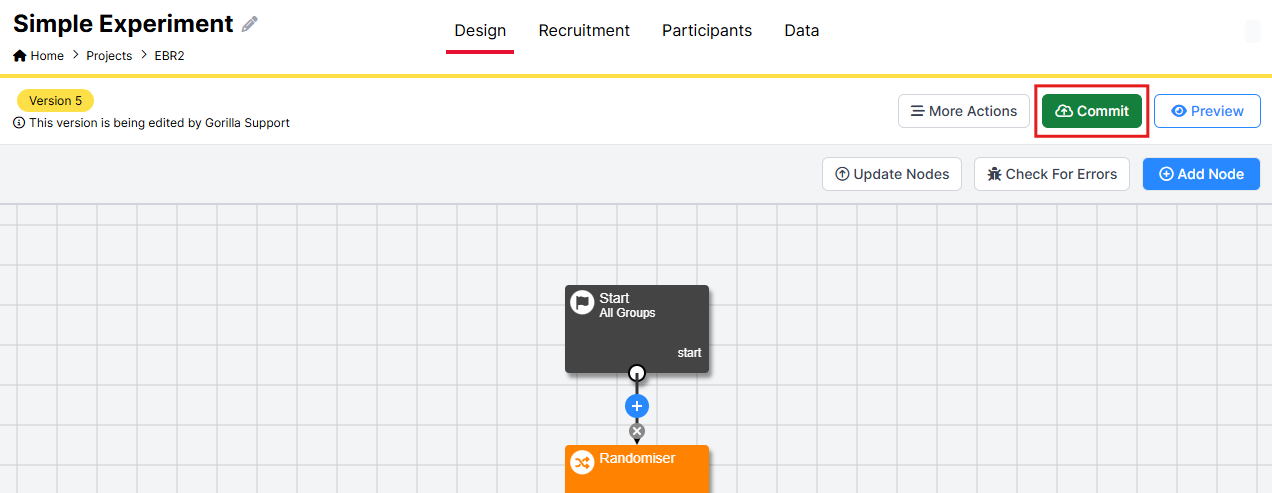
The screenshot below shows New Experiment Builder. If you are still using Classic Experiment Builder, open the expandable section.
In Classic Experiment Builder, click the green 'Commit Version X' button at the top right:
In New Experiment Builder, click the green Commit button at the top right:
Auto-commit and update nodes on experiment commit
In New Experiment Builder, when you commit the experiment, Gorilla will alert you to any nodes that you are currently editing:
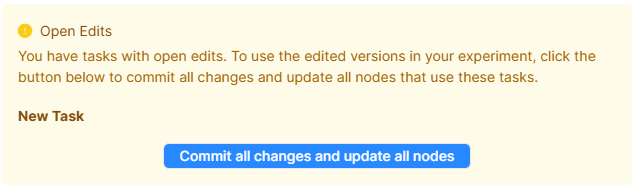
Clicking 'Commit all changes and update all nodes' commits all open changes to all activities in your experiment, and updates all nodes to use the newly committed versions.
If you do not click this button before committing your experiment, the experiment uses the latest committed versions before you started making your changes.
Gorilla will also alert you to any nodes that are committed, but where the experiment tree is not using the latest version:
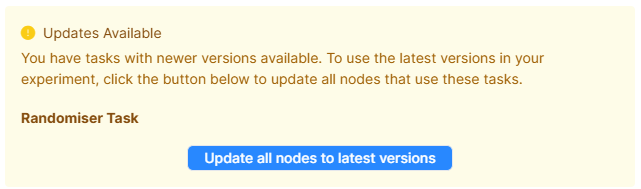
Clicking 'Update all nodes to latest versions' updates all nodes in your experiment tree to use the latest versions.
If you do not click this button before committing your experiment, the experiment uses the version currently selected in the experiment tree.