This guide is about binding in Questionnaire Builder 2. For information on binding in Task Builder 2 and Game Builder, see the General Binding Guide.
When building questionnaires, many configuration settings can be set directly. Whether it's the question text itself or the range of options for a dropdown input, you can simply set the value you want in the tools:
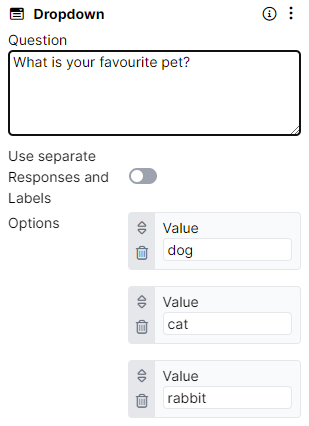
In the case above, the response options in the Dropdown will always be 'dog', 'cat', and 'rabbit'. But this isn't always what we want - we might want to have two experimental conditions with different response options. Or we might want the response options to change dynamically depending on the participant's previous responses.
Instead of entering a value directly, we can instead dynamically link this field to another source of data - for example, an experimental manipulation, or a previous response. In Gorilla, we call this binding - we bind the field to a data source that allows it to be defined elsewhere. You can bind any configuration setting that has the little link icon ( ).
Browse the list of topics in the menu for more information on the different types of binding.
This guide is about binding in Questionnaire Builder 2. For information on binding in Task Builder 2 and Game Builder, see the General Binding Guide.
There are two main uses cases for binding to responses in Questionnaire Builder 2: 1) conditional logic, otherwise known as display logic; 2) directly binding response options to previous responses, otherwise known as piped text.
When building questionnaires, it's common for some questions to be conditional on the participant's response to other questions. For example, you may want to ask participants if they currently smoke, and if they do, whether they want to stop. If they don't currently smoke, we obviously don't want to ask them if they want to stop:
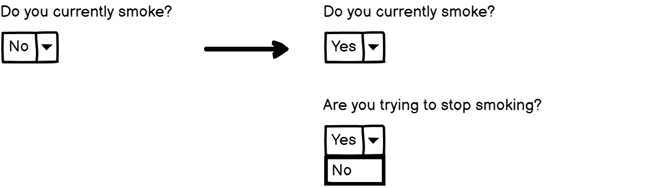
To do this, we can set the second of these two questions to be conditional, and set the condition to be that we've answered 'Yes' to the smoking question. These conditions will update in real time - any time the response changes, the logic will be evaluated and the visibility of the second question will update dynamically:
Sometimes, instead of setting the possible responses for a question directly, we want to pull those responses through from what the participant entered for a previous question. For example, in the following video, the participant first enters three animals they have owned as pets. The three animals they entered are then listed as the response options in a dropdown on the next page.
To set this up, click the binding icon to the right of the response you want to bind:
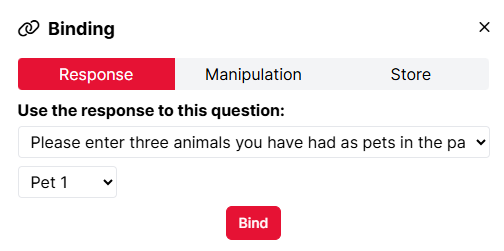
From the dropdown, select the previous response you want to use to populate this response option. Here, the 'Pet 1' response to the 'Please enter three animals you have had as pets in the past' option is selected:
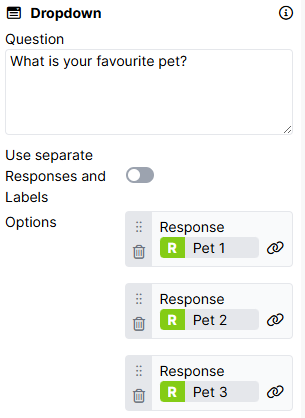
Once bound, the response options will appear with a green R showing they are bound to previous responses:
This guide is about binding to manipulations in Questionnaire Builder 2. For information on binding to manipulations in Task Builder 2 and Game Builder, see the General Binding Guide.
Manipulations are settings that you can control at the experimental level. Rather than have settings that are the same for every participant, this allows you to have settings which you can configure differently for different experimental conditions. For example, you may want all your participants to do the same questionnaire, but change a single page between two conditions:
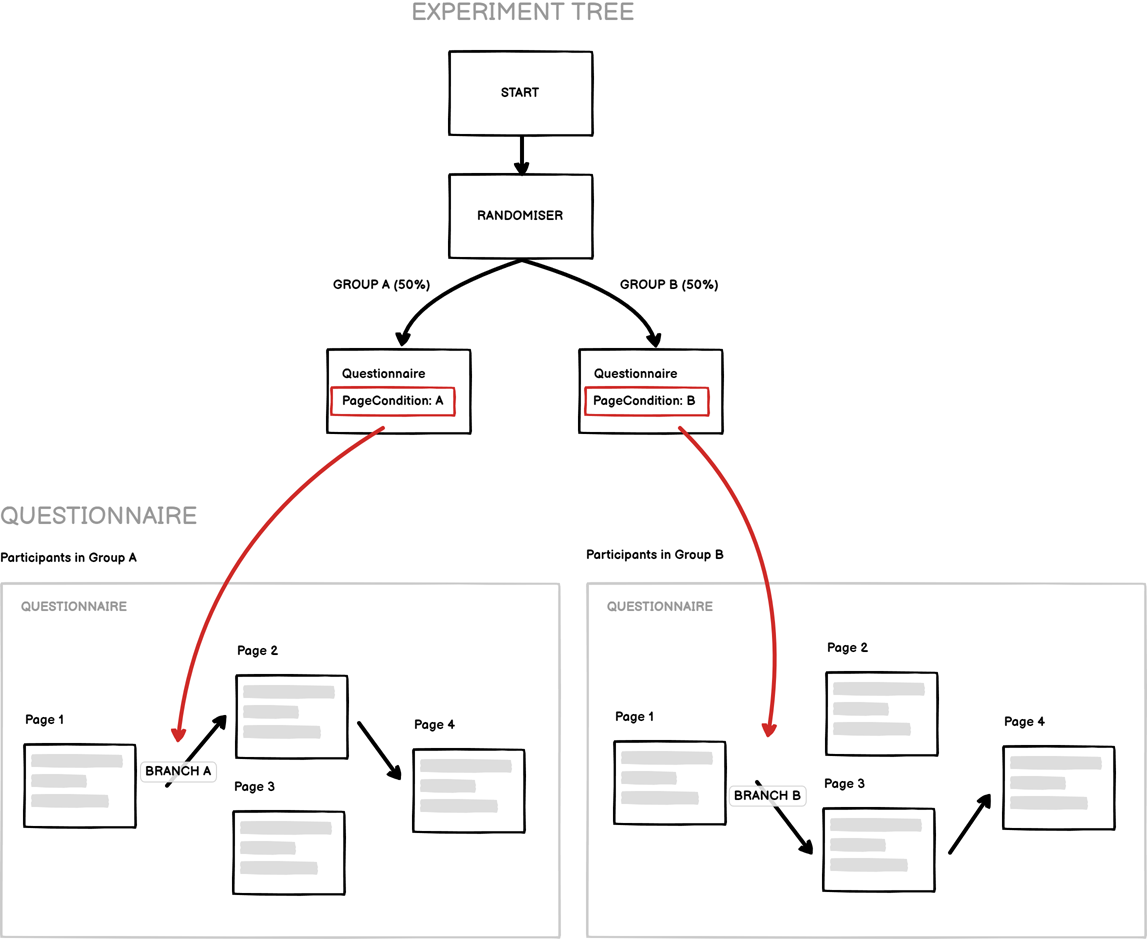
By default, questionnaires advance to the next page, so to implement this we only need to add two branching rules: Page 1 should branch to Page 3 if we are in the B condition and Page 2 should branch to Page 4 if we are in the A condition.
This guide is about binding to the Store in Questionnaire Builder 2. For information on binding to the Store in Task Builder 2 and Game Builder, see the General Binding Guide.
Tutorials that show this feature
Tutorial: Branching from a Questionnaire
Each participant has their own unique Store - data that belongs to them and stays with them for the duration of the experiment. You can think of it as a little backpack or suitcase that each participant carries with them, and you can put values in there and then retrieve them again later. In the first generation of tools, this was referred to as Embedded Data - we've changed the name to Store because we think it's a better term, but it fulfils the same function.
The simplest use-case for the Store is when you want to save a participant's response from a questionnaire and then use it later in the experiment. Note that this is separate from recording responses for your actual experimental data that you download once your participants have finished - participant responses are always recorded in your downloaded data; the Store is purely when you also want to be able to use a particular response later in the experiment.
For example, imagine an experiment where we want participants to do one task if they prefer cats, and a different task if they prefer dogs. We would have a questionnaire first that asks them whether they prefer cats or dogs, and then save that response to the Store so that we can use it in a branch node later:
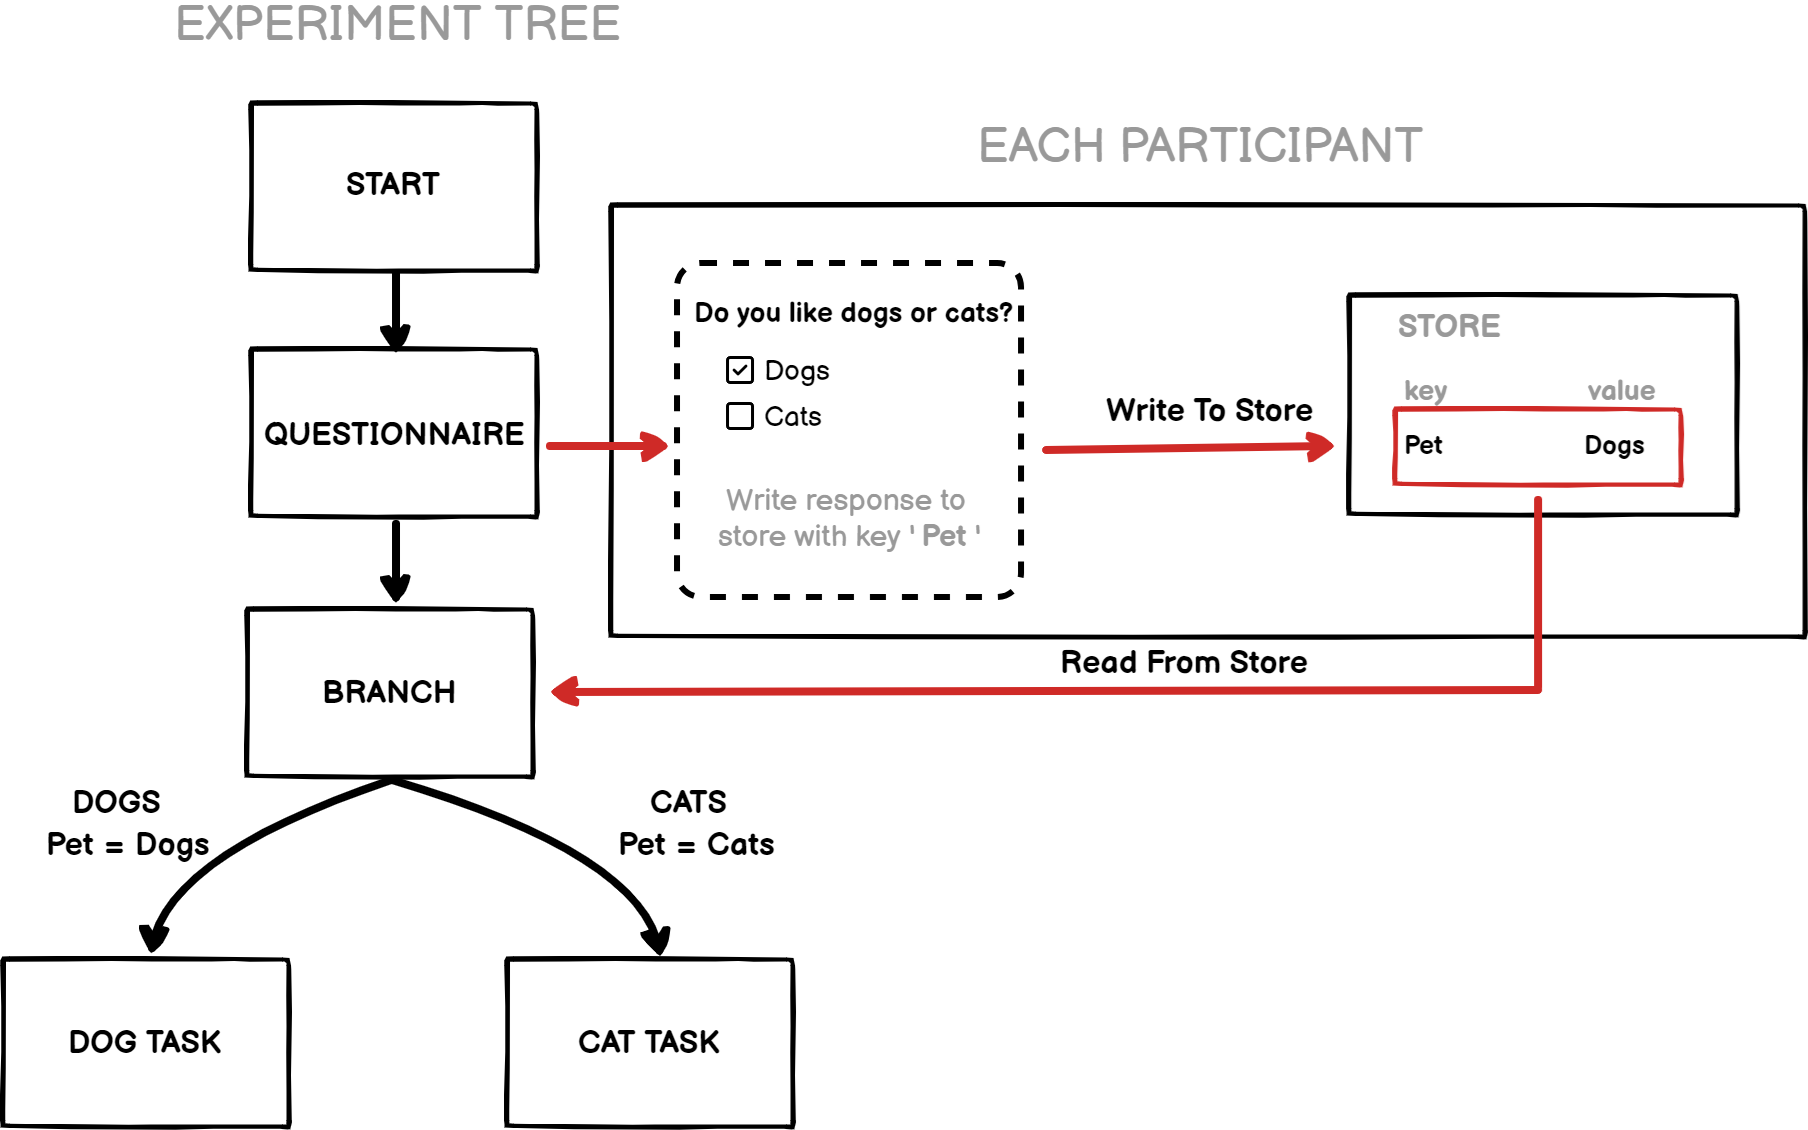
To do this, you simply select the object that returns the response, click 'Show Advanced Settings', enable 'Save To Store', and set the field you want to store it under. In this example, the choice of Dogs or Cats will be saved to a field called Pet, which can then be used in the experiment tree or a future task: