Gorilla Teaching Tools
Overview
Gorilla is a great resource for online teaching.
With our inbuilt teaching tools, you can create assignments for your students, provide them with materials and review their submissions.
Your students will get practical experience with research methods by creating and editing real online experiments.
Watch our video demo to learn how to set up an assignment on Gorilla!
To get access to our teaching tools, you need to be a user on a department subscription - just ask your subscription administrator to give you the 'Teacher' role!
Teaching Tools
How to get to the tools
Have a look at the video for an overview of Gorilla's Teaching Tools. To get access to the Teaching Tools, just ask your department's subscription administrator to give you the 'Teacher' role.
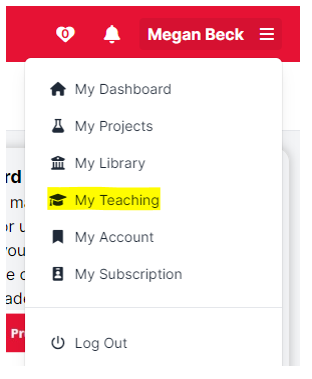
Both teachers and students can access their modules and assignments by clicking the My Teaching tab. To access the tab, click on the corner menu as demonstrated below:
From the teacher's side
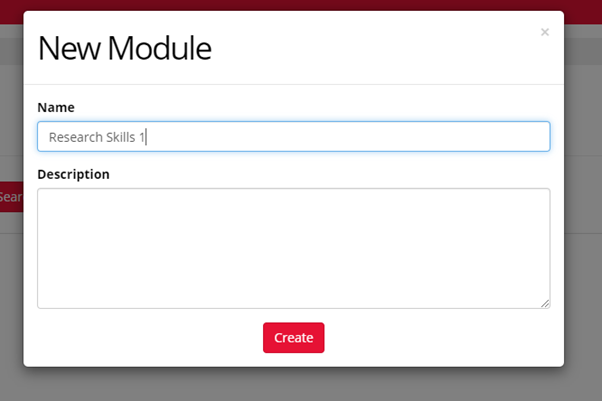
The first thing to do as you start setting up projects for your students is creating a module. This works in the same way as module of a university course and can include several assignments and materials.
When you have created a new module, a page will open where you can add assignments and materials for that specific module.
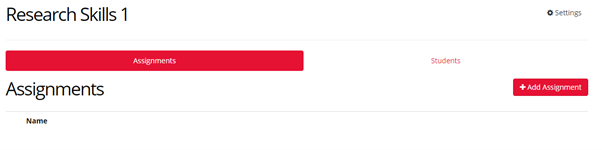
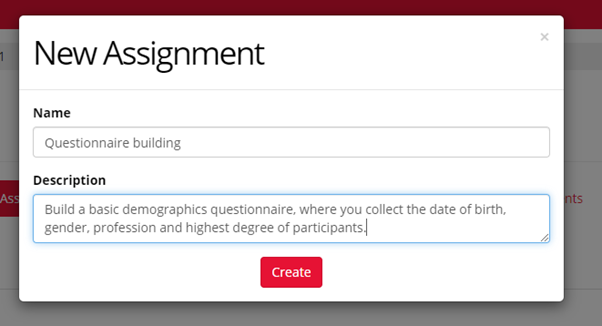
By clicking on the Students tab, you will be able to add and see the students enrolled on this module. You can add a list of students by uploading a spreadsheet with their e-mail addresses. On the Assignments tab, you will be able to add and see all assignments of this module. By adding an assignment, you can give this a name and add a short description, so your students know what they will have to do.
When you have created a new assignment, a page will open where you can see your students’ submissions and add any materials for them to use.
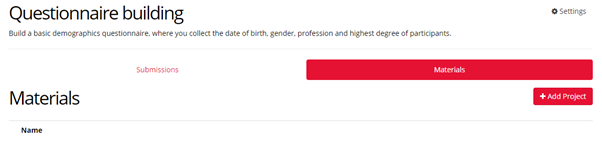
For example, by clicking on Add Project, you can choose any of your own projects to be made available for students. They will then be able to clone this project, edit it and submit it back for you to have a look at. If you want students to build an experiment or questionnaire from scratch, this is also possible, and you do not need to include any material in that case. Once you receive your students’ submissions, they will appear in the Submissions tab. If you click on their name, you can see if the student has included some notes in addition to their work. If you click on their project, you can check out their work.
From the student's side
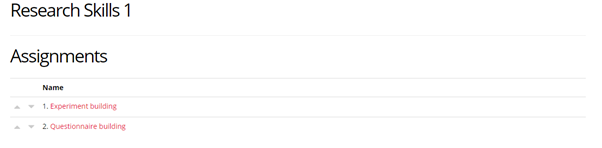
Once a teacher has added you to their module, you will be able to see all the assignments they have made available. It will look something like the screenshot below.
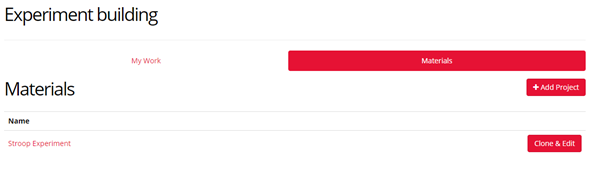
Once you click on one assignment, you can see any materials your teacher has provided for you in the Materials tab. In this example, your teacher has made the Stroop Experiment available, and you can now clone and edit this by clicking the button on the right.
This will open a new window where you can choose to give this experiment a different name (which might be useful to not get confused about whether this was your modified project or just a clone from your teacher’s project). You can also decide whether you want to attach this project directly to an assignment.
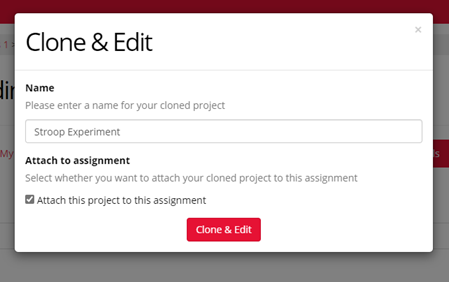
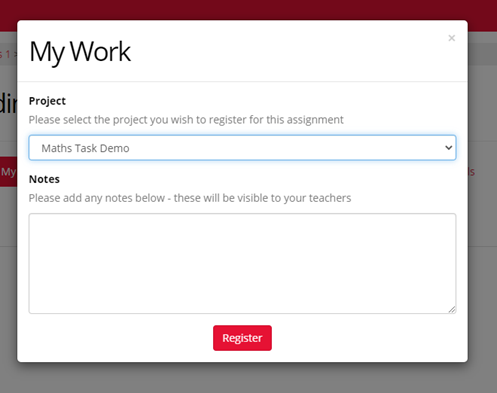
If you tick this box, it means that all your changes are immediately visible for your teacher. This submission is automatically updated if you make any more edits and commits, but your teacher has access to it at any time. You can also untick the box to work on the project before submitting it. In that case, you would later go back to the My Work tab of your assignment (see above) and click on Register Project by choosing the project you worked on.
When submitting your own project, you can decide to add some notes, which your teacher can see when looking at your assignment.