Creating UX Tasks in Gorilla
Overview
This page is a guide to creating UX/UI tasks in Task Builder 2. The tasks are great examples of investigations into how users interact with websites and improving their overall usability or behavioural architecture. These tasks are easy to set up using combinations of components layered on top of one another and without the need for any additional code. Of course, all the behavioural metrics are provided in the data output, too!
UX Example 1
In this task, we create a simulated Gorilla webpage to measure how users interact with the site before signing up. To achieve this, a series of objects have been created by using the Image - Hover component and Click Response component together. The Image - Hover components allow you to use different images to be presented as the default image, and when the mouse is hovering over the object. This gives the impression of a clickable button. When the object is clicked on, the response defined by the Click Response component is used in the Branch component. We can then branch participants to different screens in the display, depending on the response received. On each of the screens, a 'back button' has been configured in the same way to allow participants to return to the 'Home' screen.
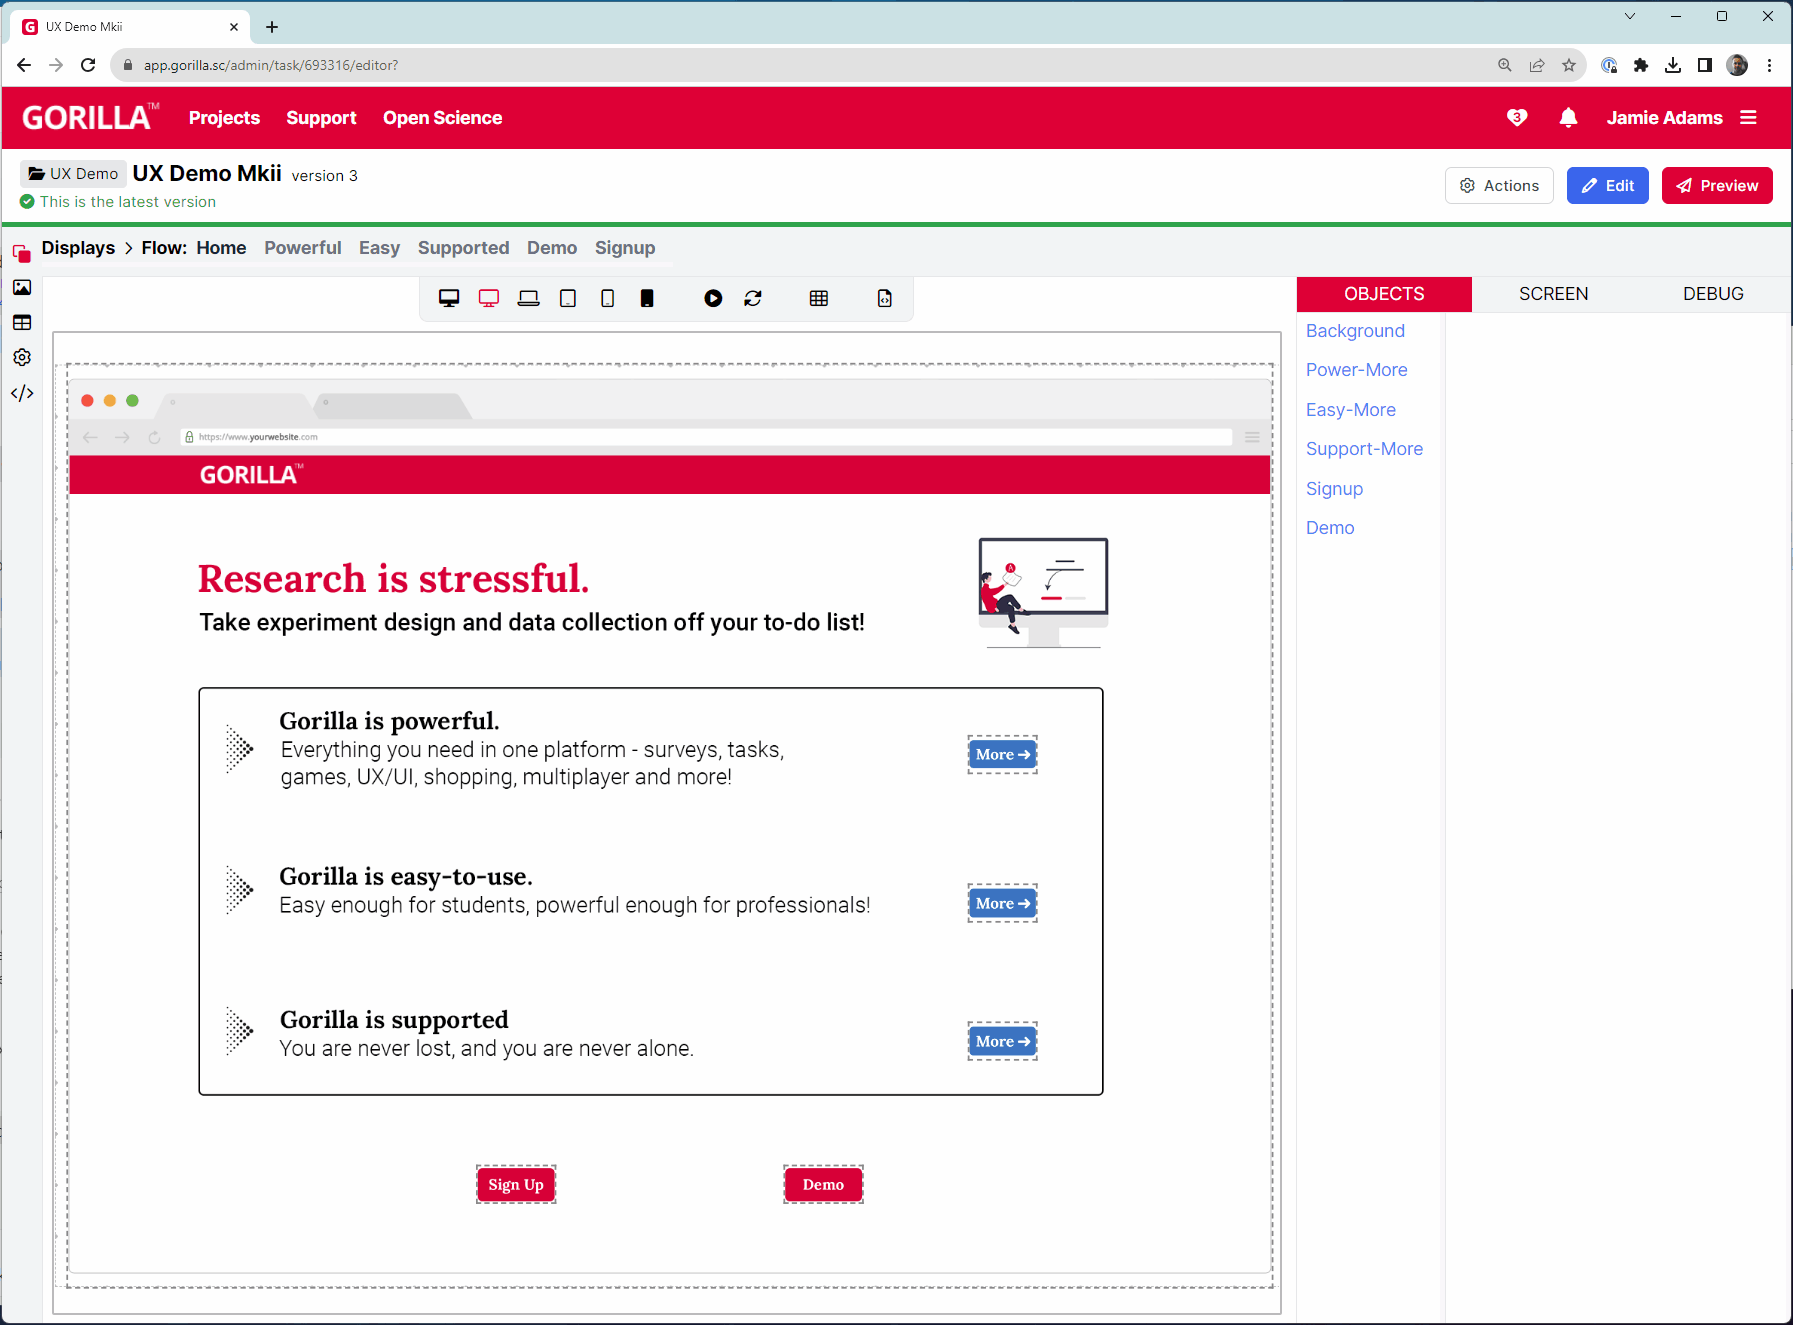
Have a closer look at how this Gorilla UX Example Task has been set up.
UX Example 2
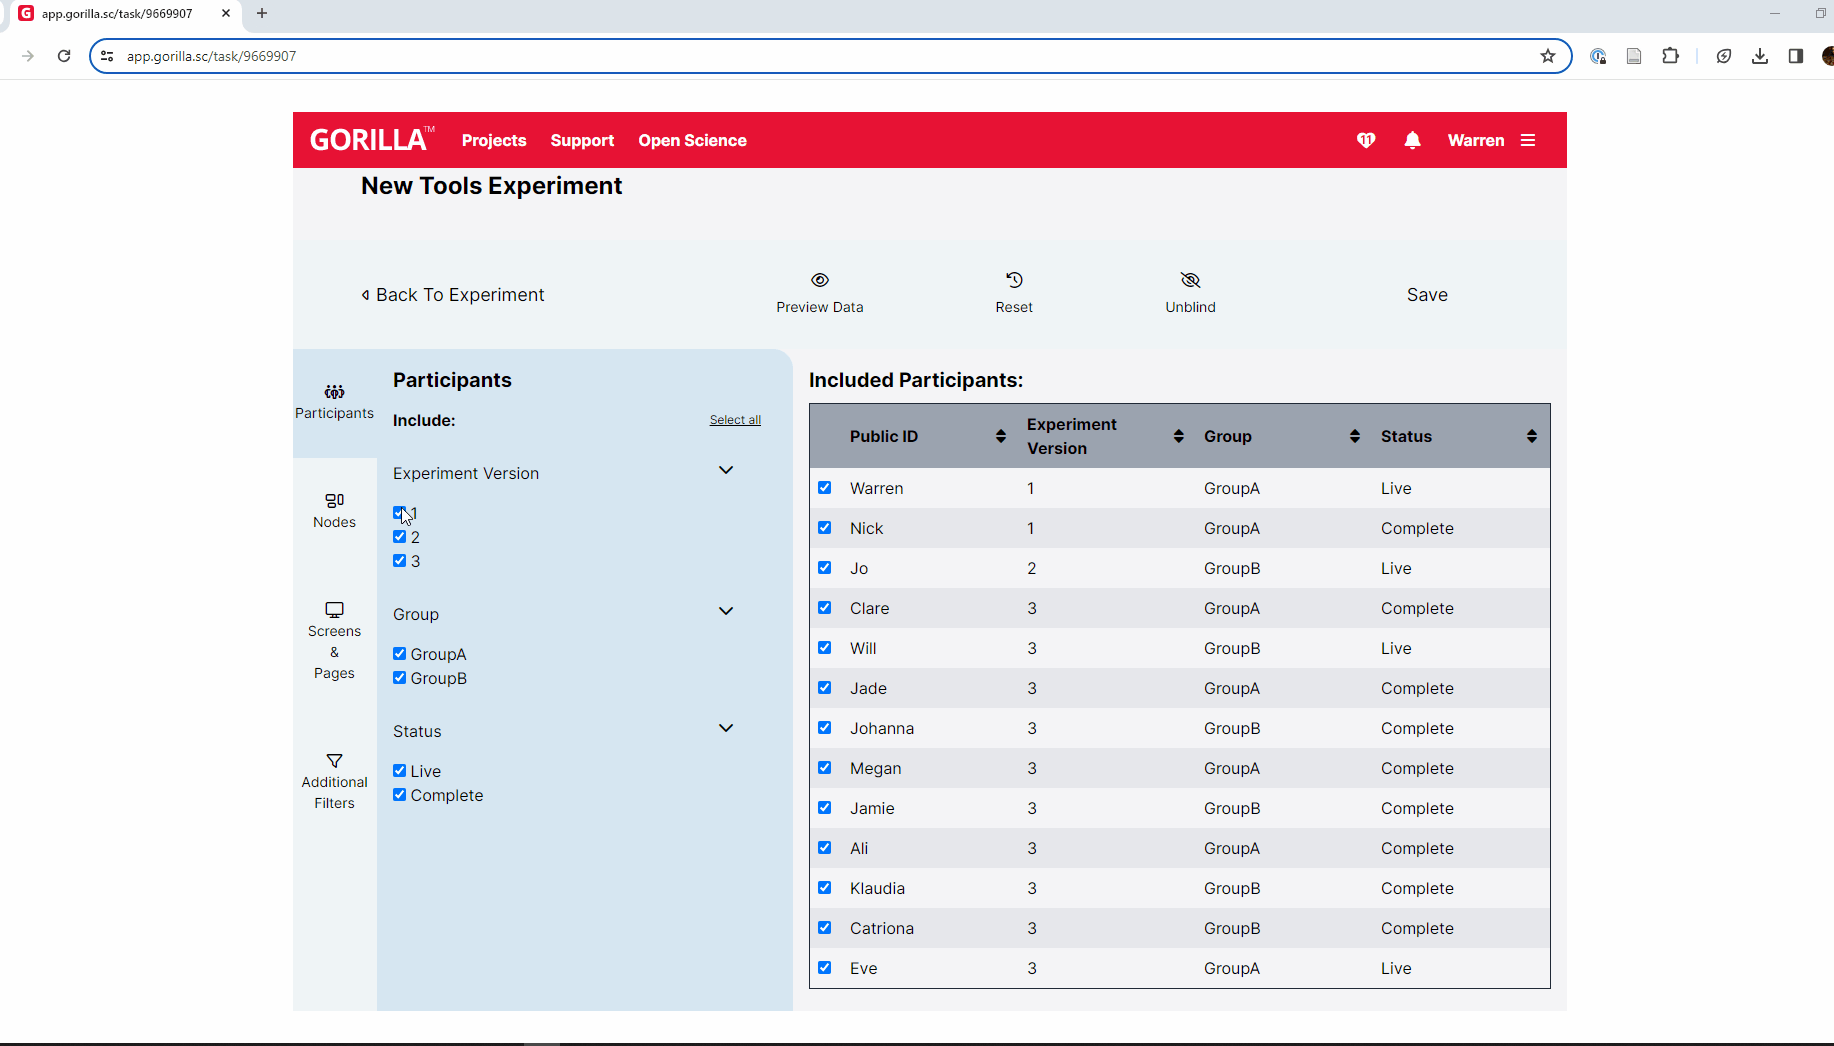
This task is an example of how we use Task Builder 2 to create our own usability tests for our new tools. In this example, an Image component is used to create the background. Then, we collect responses from participants via a series of Response objects which are made of Hotspot components, Overlay components and Click Response components. The Hotspots define the area of the screen which we would like to be clickable to participants. The Overlay components ensure that the Hotspots remain in the same position relative to the background image. This is especially important when you want to define multiple clickable areas, which should all be positioned in relation to one another, on a single screen. Finally, the Click Response component records the response when the Hotspot is clicked. This response is then used in the Branch component to direct participants to different screens of the display based on their response.
For more examples of how you can use Gorilla for UX/UI research, see our showcase video: